Haute couture for a baby? It feels alike. Just kidding. In a way it`s like yoga for me. I love hand embroidering. It`s so meditative. The same stitches over and over again, while you let your thoughts fly. I think that`s the reason why I spend a few hours embroidering a baby dress.

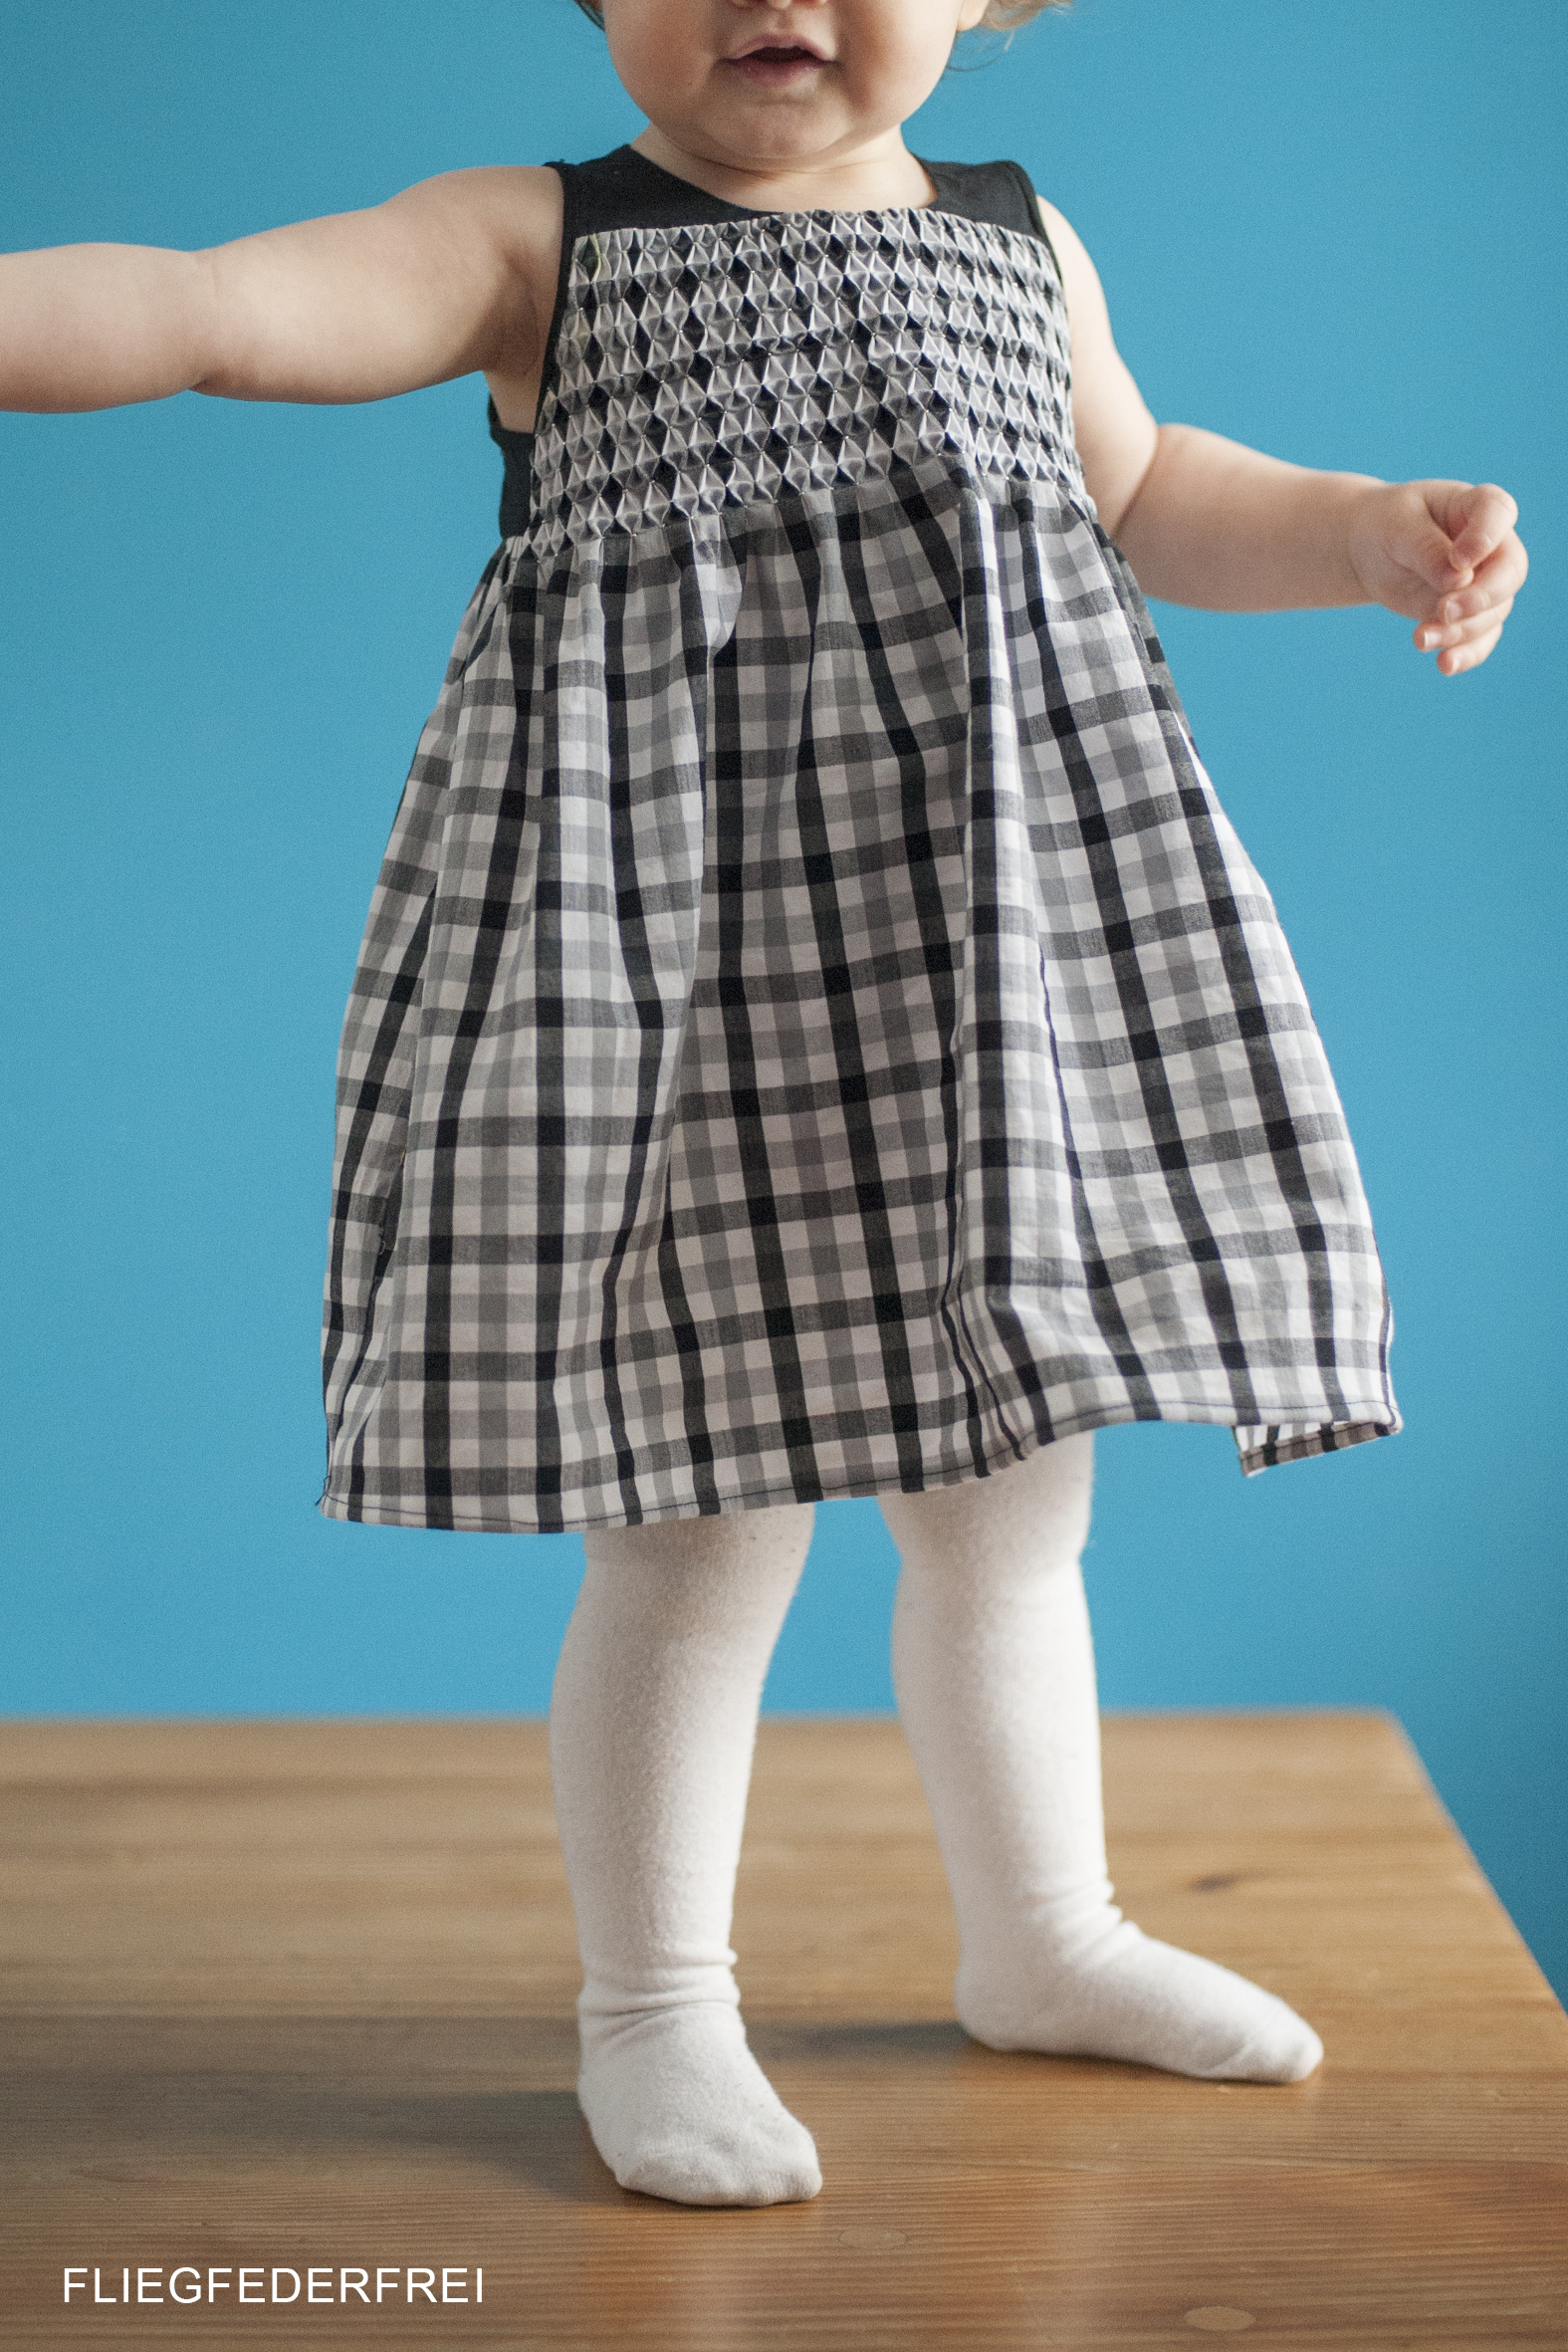
But look at this beauty, totally worth the effort, don`t you think? Hand smocking is an all time favorite. It gives the fabric a structure. And if you do it like me, on a small repetitive swatch, like a gingham, it changes the pattern in a very interesting way.

The dress is self-drafted. I`m exploring the possibilities of gathering fabric. Smocking is a good one. It adds a little stretch to a woven fabric.


That`s a vintage button of my stash. Always a pleasure, to find the perfect one in my collection. I just lined the back bodice. The wrong side of a smock is nearly as beautiful as the front. I didn`t want to hide it. The armholes are finished with a very narrow bias-binding.

Wanna try it yourself?
Here is the tutorial for Honeycomb Smocking
Honeycomb Smock

That`s what you`ll need. Only use woven fabric`s. Cotton, Voile, Baptist, Linen (not to heavy)…
You can smock plain fabric, but then you`ll have to mark the points first.
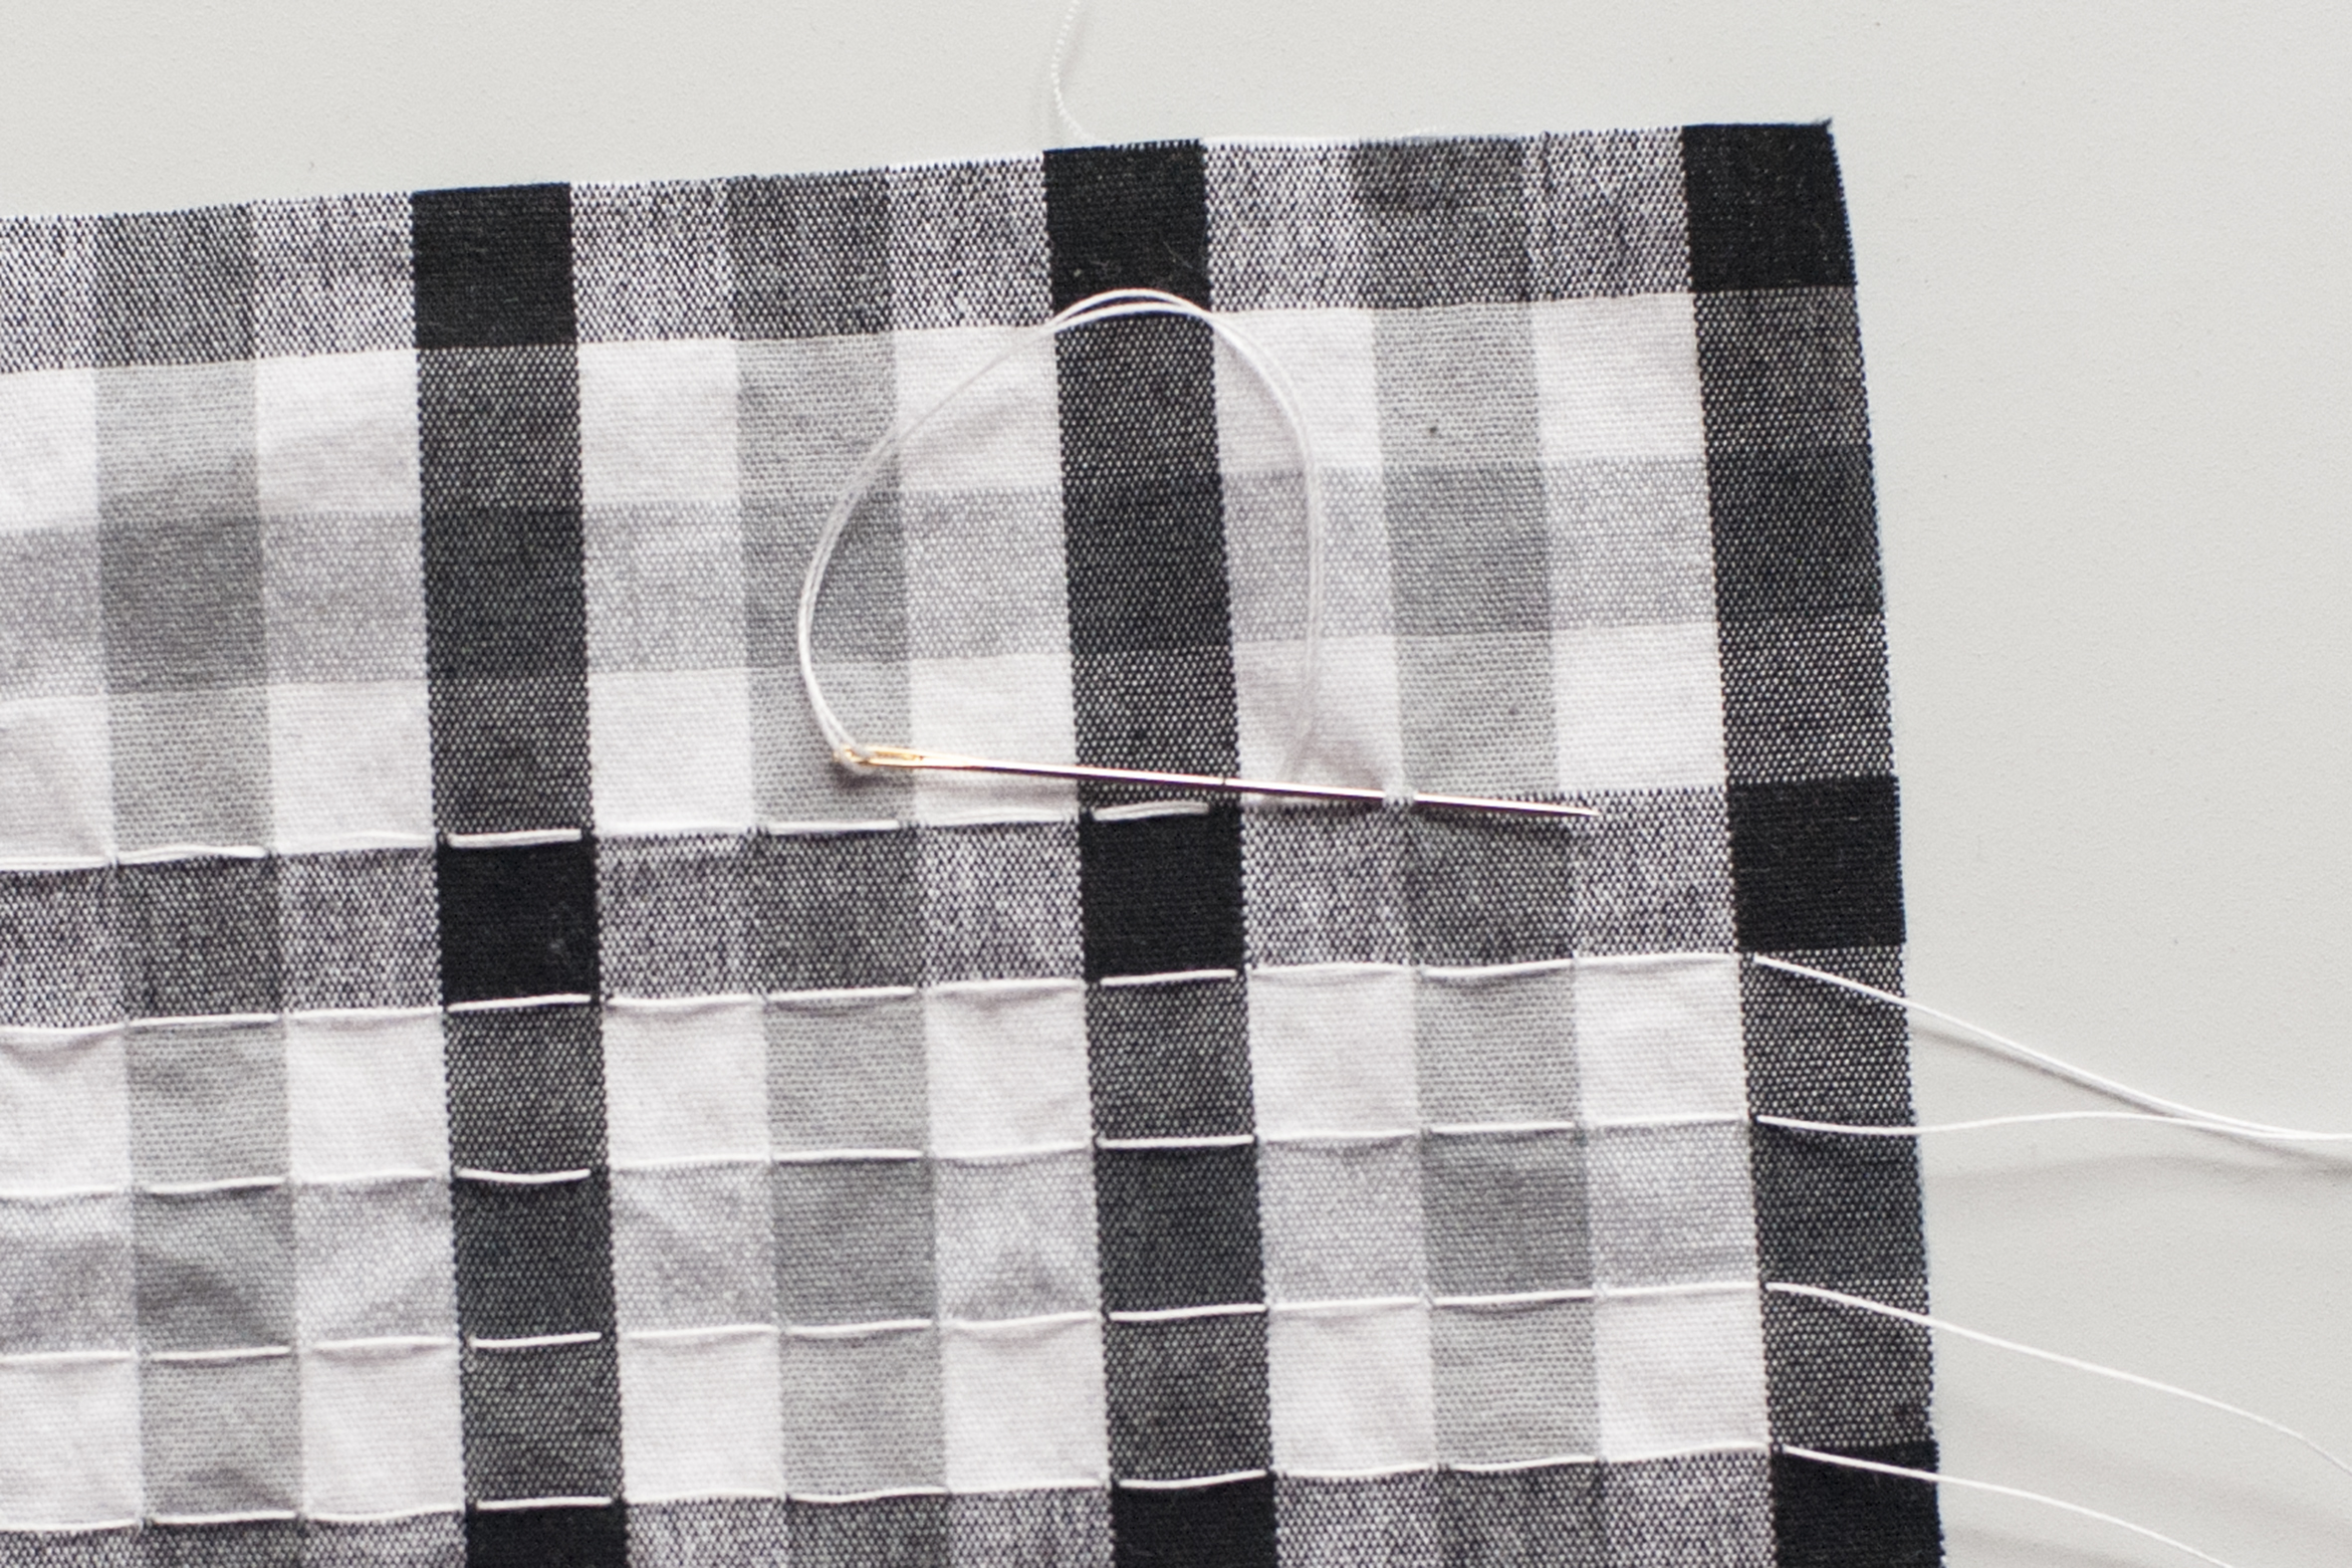
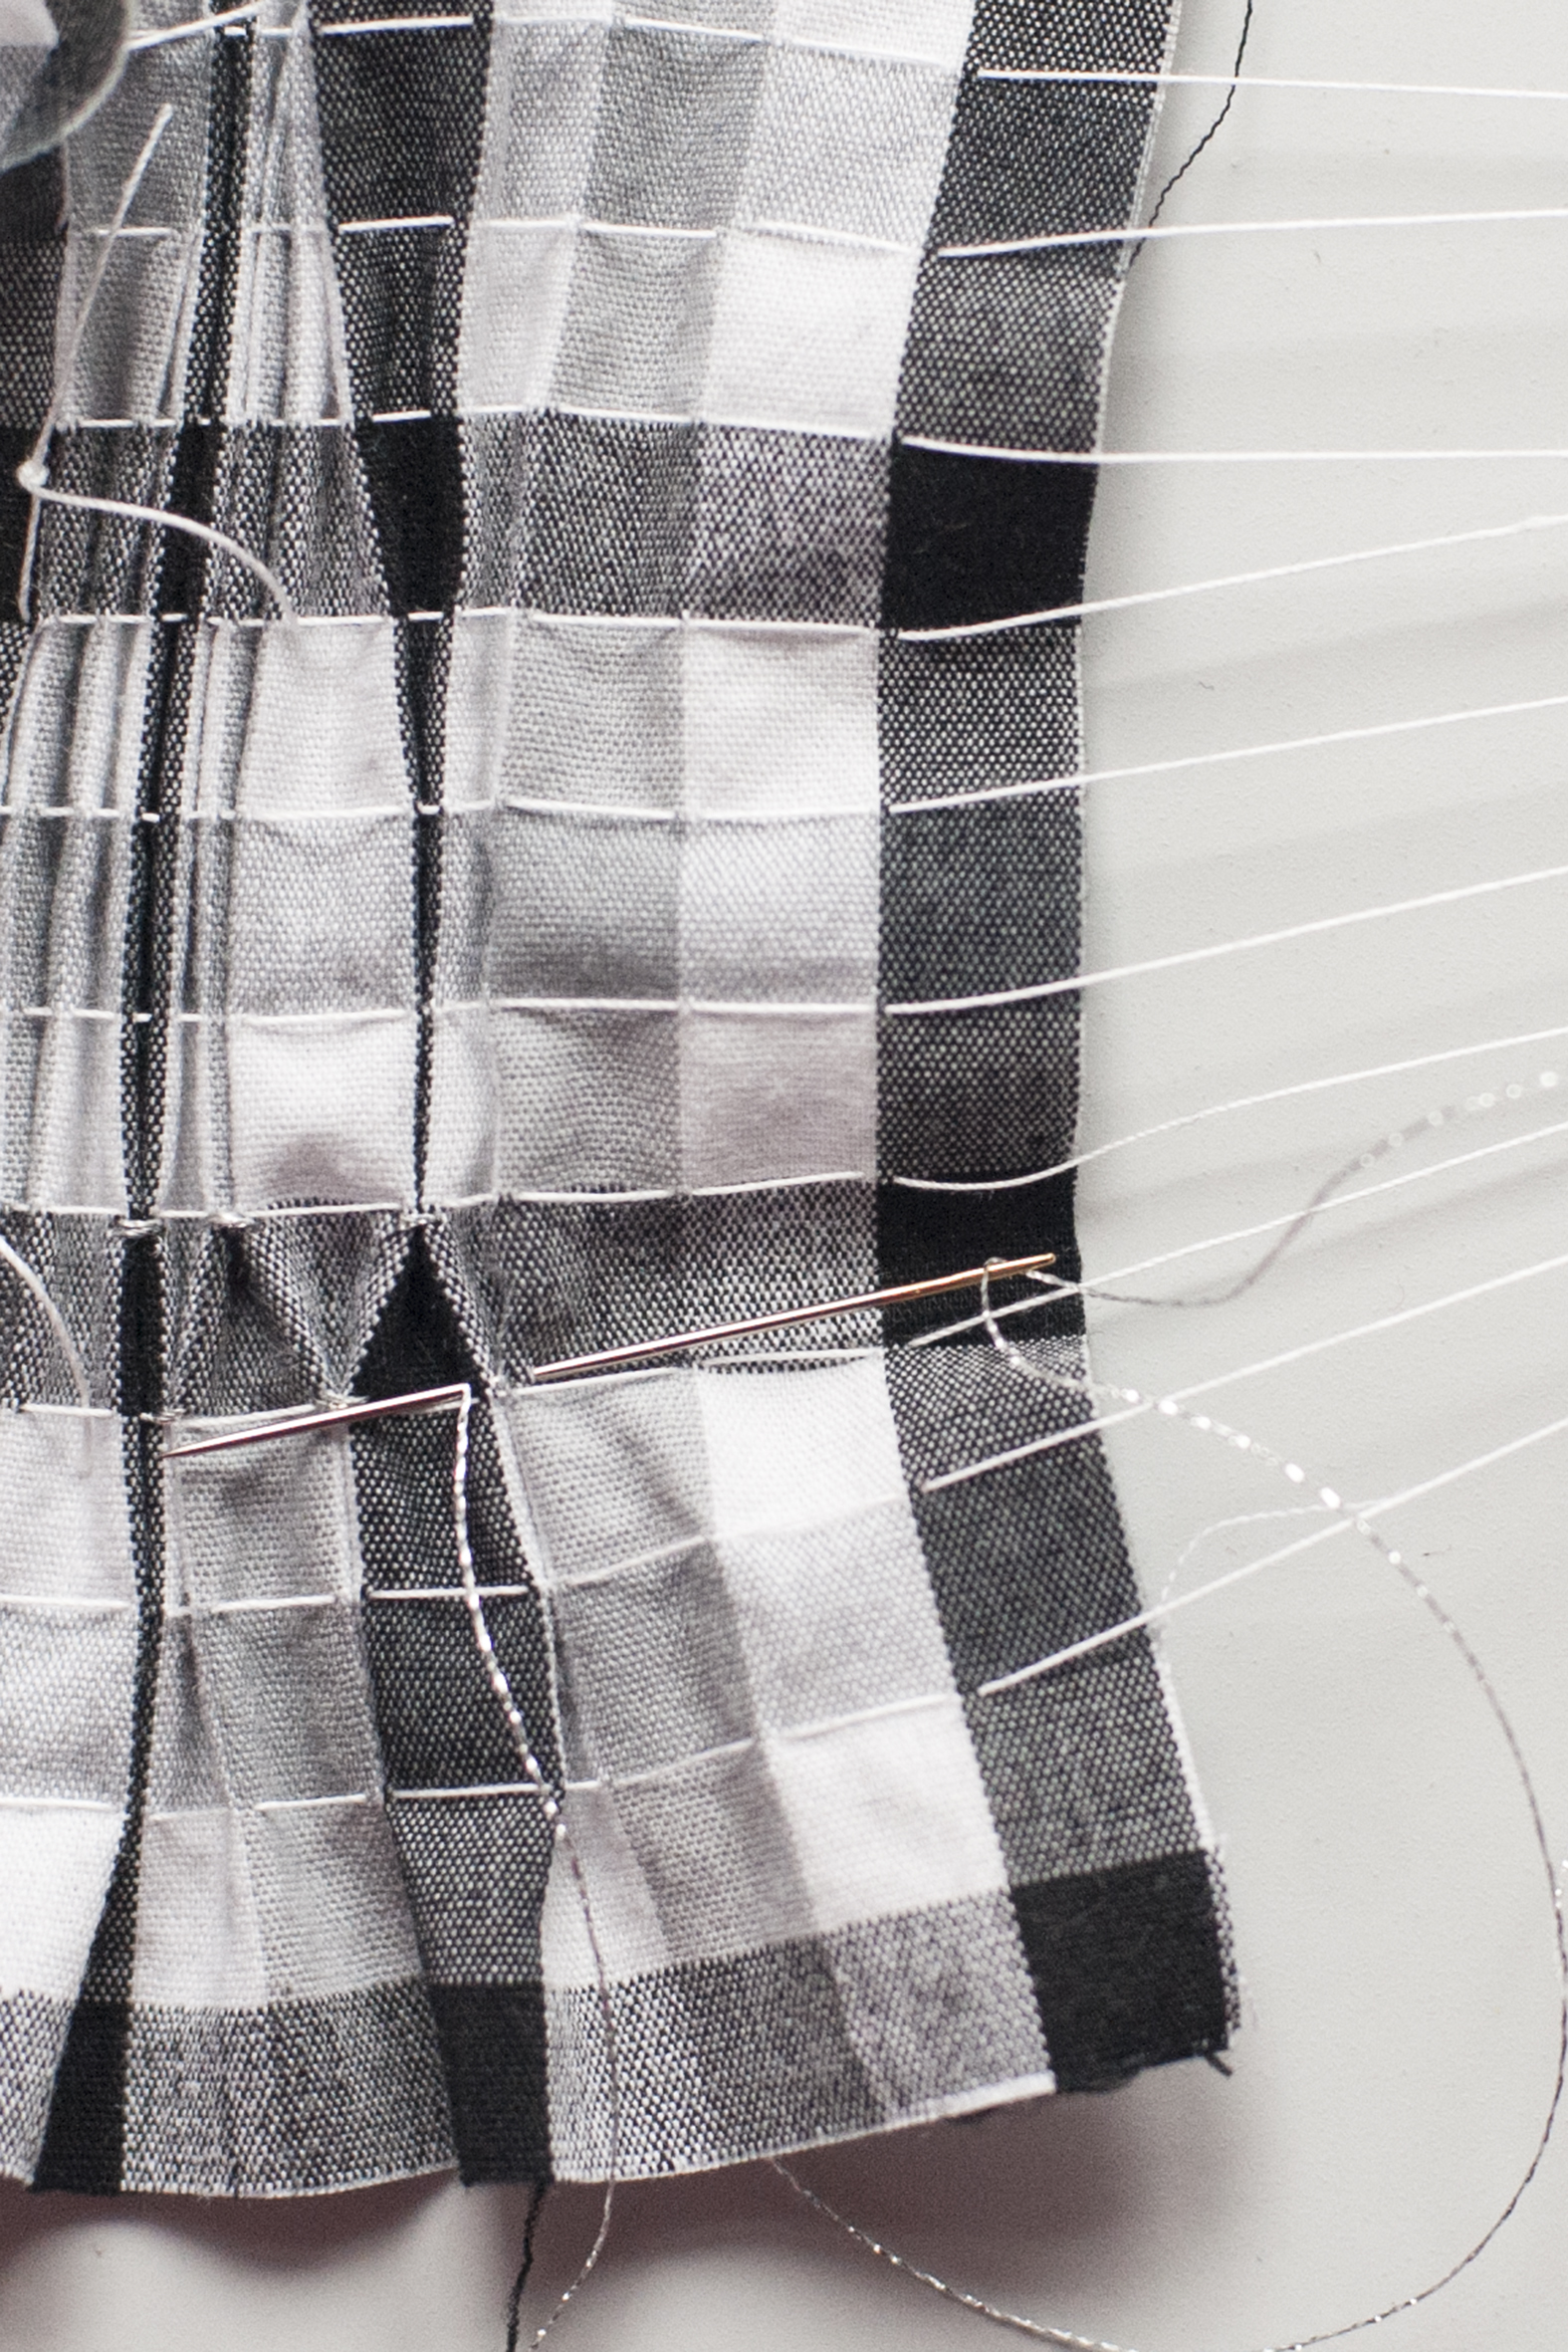
Prepare the fabric like shown in the picture. Be sure to leave the threads long enough. Gather the fabric, by pulling those threads.
This is an overview of the technique, I added pictures to visualize the different steps.
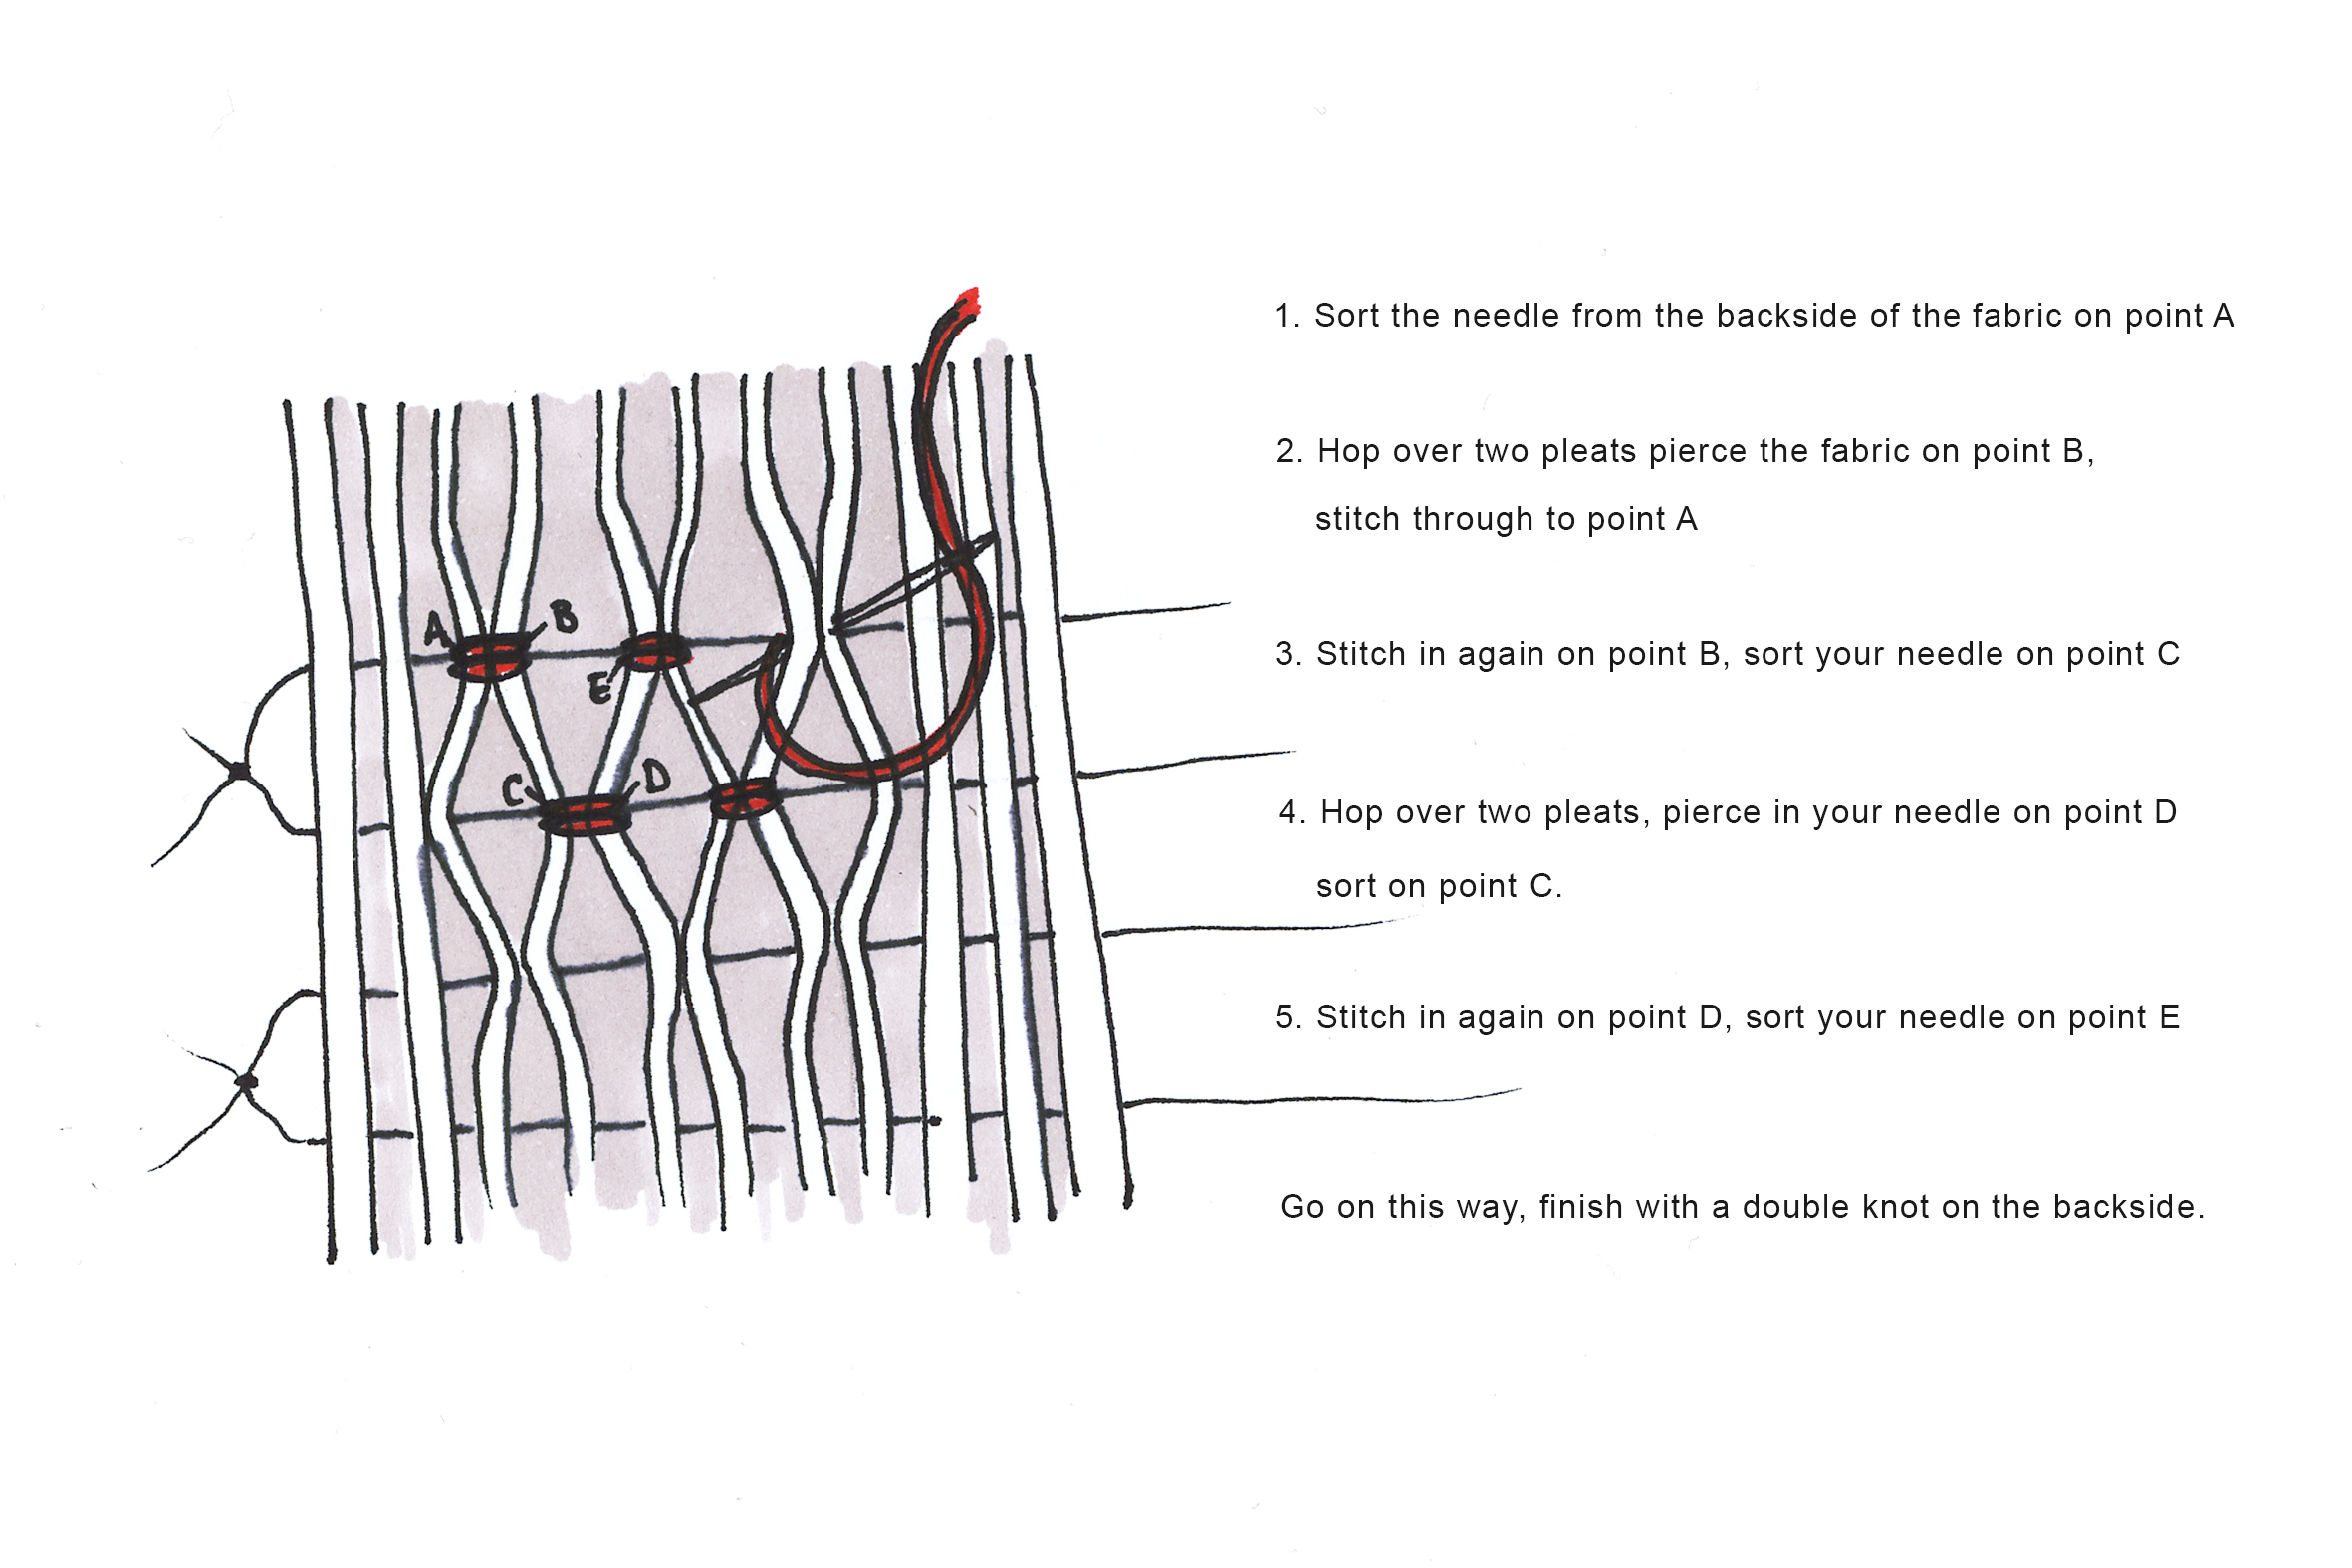
Step 1
Sort the needle from the backside of the fabric on point A.
Step 2
Hop over two pleats pierce the fabric on point B. Stitch through to point A.
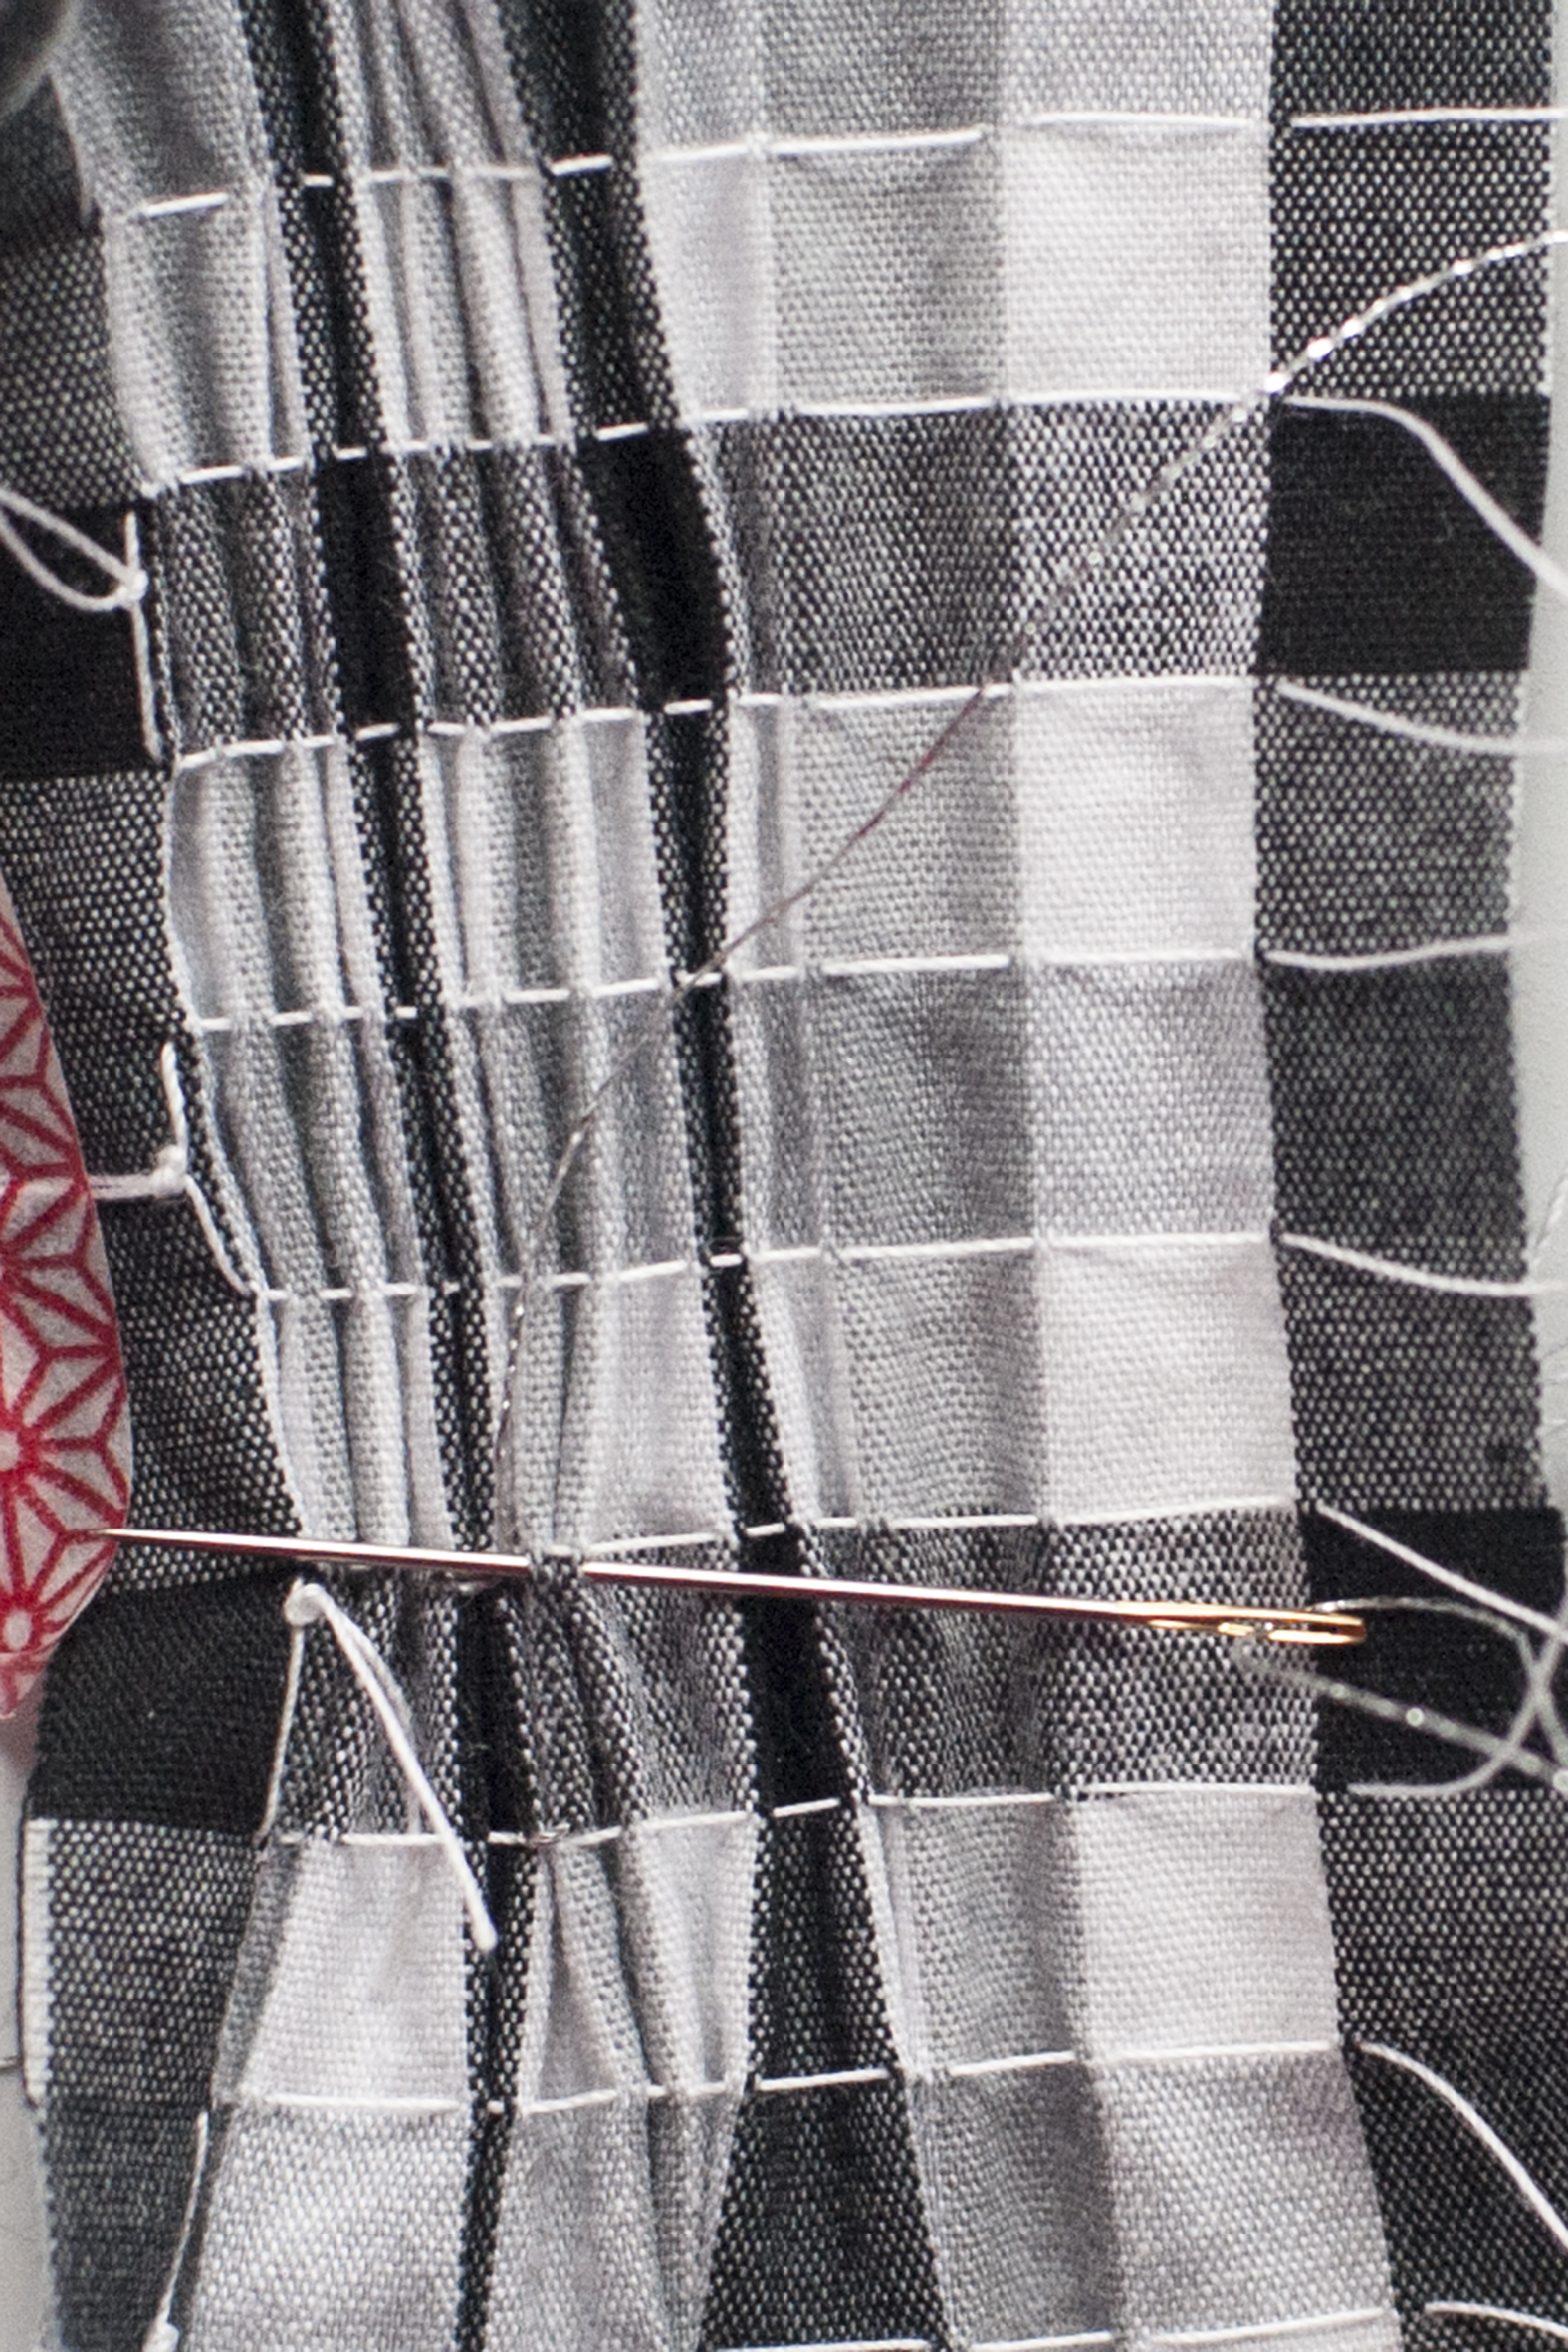
That`s how it should look, if you stitch through two pleats. You`ll pierce through 4 layers of fabric and sort just before the top of the pleat on point A.
Step 3

Stitch in again on point B, sort your needle on point C.
(You`ll sort just before the top of the pleat. As shown in the picture.)
Step 4
Hop over two pleats stitch in your needle on point D. Sort your needle on point C.
Step 5
Stitch in again on point D, sort your needle on point E.
(Check the picture on step 3, those steps are alike, this time you only stitch back up instead of down.)
—> Repeat this steps until you`re done. Stop with a double knot on the backside.
Pull out the gathering threads

Here you are, easy isn`t it? Just do it a few times and it will go by itself.

Note: Your fabric will halve itself in the width. For example, if your front bodice is 26 cm width you`ll need 51cm of fabric. The length of your piece will not change.

I love the look! I did something similar once, but thought that I always had to finish each knot. Thanks for showing I can just stitch on.
in just had a look in my stitching book, and your right, you should finish every knot. but i just stitch on and everything looks like it should. it doesn’t get loose, even after whasing and wearing. so just have fun and take the easy way ;). would love to see your project!
eeek! it’s so beautiful!! you have a lot of patience… I’m not sure I will ever smock anything because I get distracted so easily and move on to other projects. I envy you! -e
hey erin, thank you! i do not know where the patient comes from.. but i allways get excited if the pattern gets more and more visible. you should try!
Beautiful! Like you I love to hand embroider and do smocking too. It takes time but it’s definitely worth it. I’m visiting your blog for the first time and I really have to come again and see what all beautiful things there are!
hey krista, nice to meet you! i visited your blog too! love the striped linen dress you made!
Wow! Beautiful and how neatly! When my daughter was little, I loved the socked-dresses on her. But I never smocked by hand. Reading your tutorial I get sence to start!
yes you should try it, it’s way easier than it looks!