Split Hi-Low Hem Tutorial

waffle__003

I`m not the person, who makes resolutions on the beginning of a new year. This year I made one. Sewing related of course. I stopped buying clothes more than 2 years ago. There are a lot of reasons for. First, I want to know, who makes my clothes and to which conditions. Second but not less important point is that our clothes, or the way we buy clothes is eco-unfriendly. That`s why, I decided to stop buying and make it myself. Now, i know exactly who made my clothes and because i made them myself, they bring me so much joy. Pieces i love to wear everyday for hopefully a long time. For 2017 it`s my goal to sew all the stuff, which is really missing in my closet. You know, the stuff you don`t fancy to sew, when there is just an other nice dresspattern on your table. Like sweaters, t-shirts, leggins and underwear. Yes underwear.

waffle__004

To help me to stick at my mission I decided to sew along with Project sew it. I`ll try to sew  a wardrobe stable item for myself or my husband every month. Or even better, for both of us.

waffle__002

January was all about sweaters. Haha, yes. Waffle knit sweaters for Mr. and Mrs. Fliegfederfrei. We`re not going to wear them on the same day, of course.

It`s not the same fabric actually, mine is a Waffle knit from Miss Matatabi. It`s very beautiful with the white reverseside. The one of Mr. Fliegfederfrei is bought locally in Belgium. The cuffs and the detail on the neck are made with the backside of this fabric. Different, but not less beautiful.

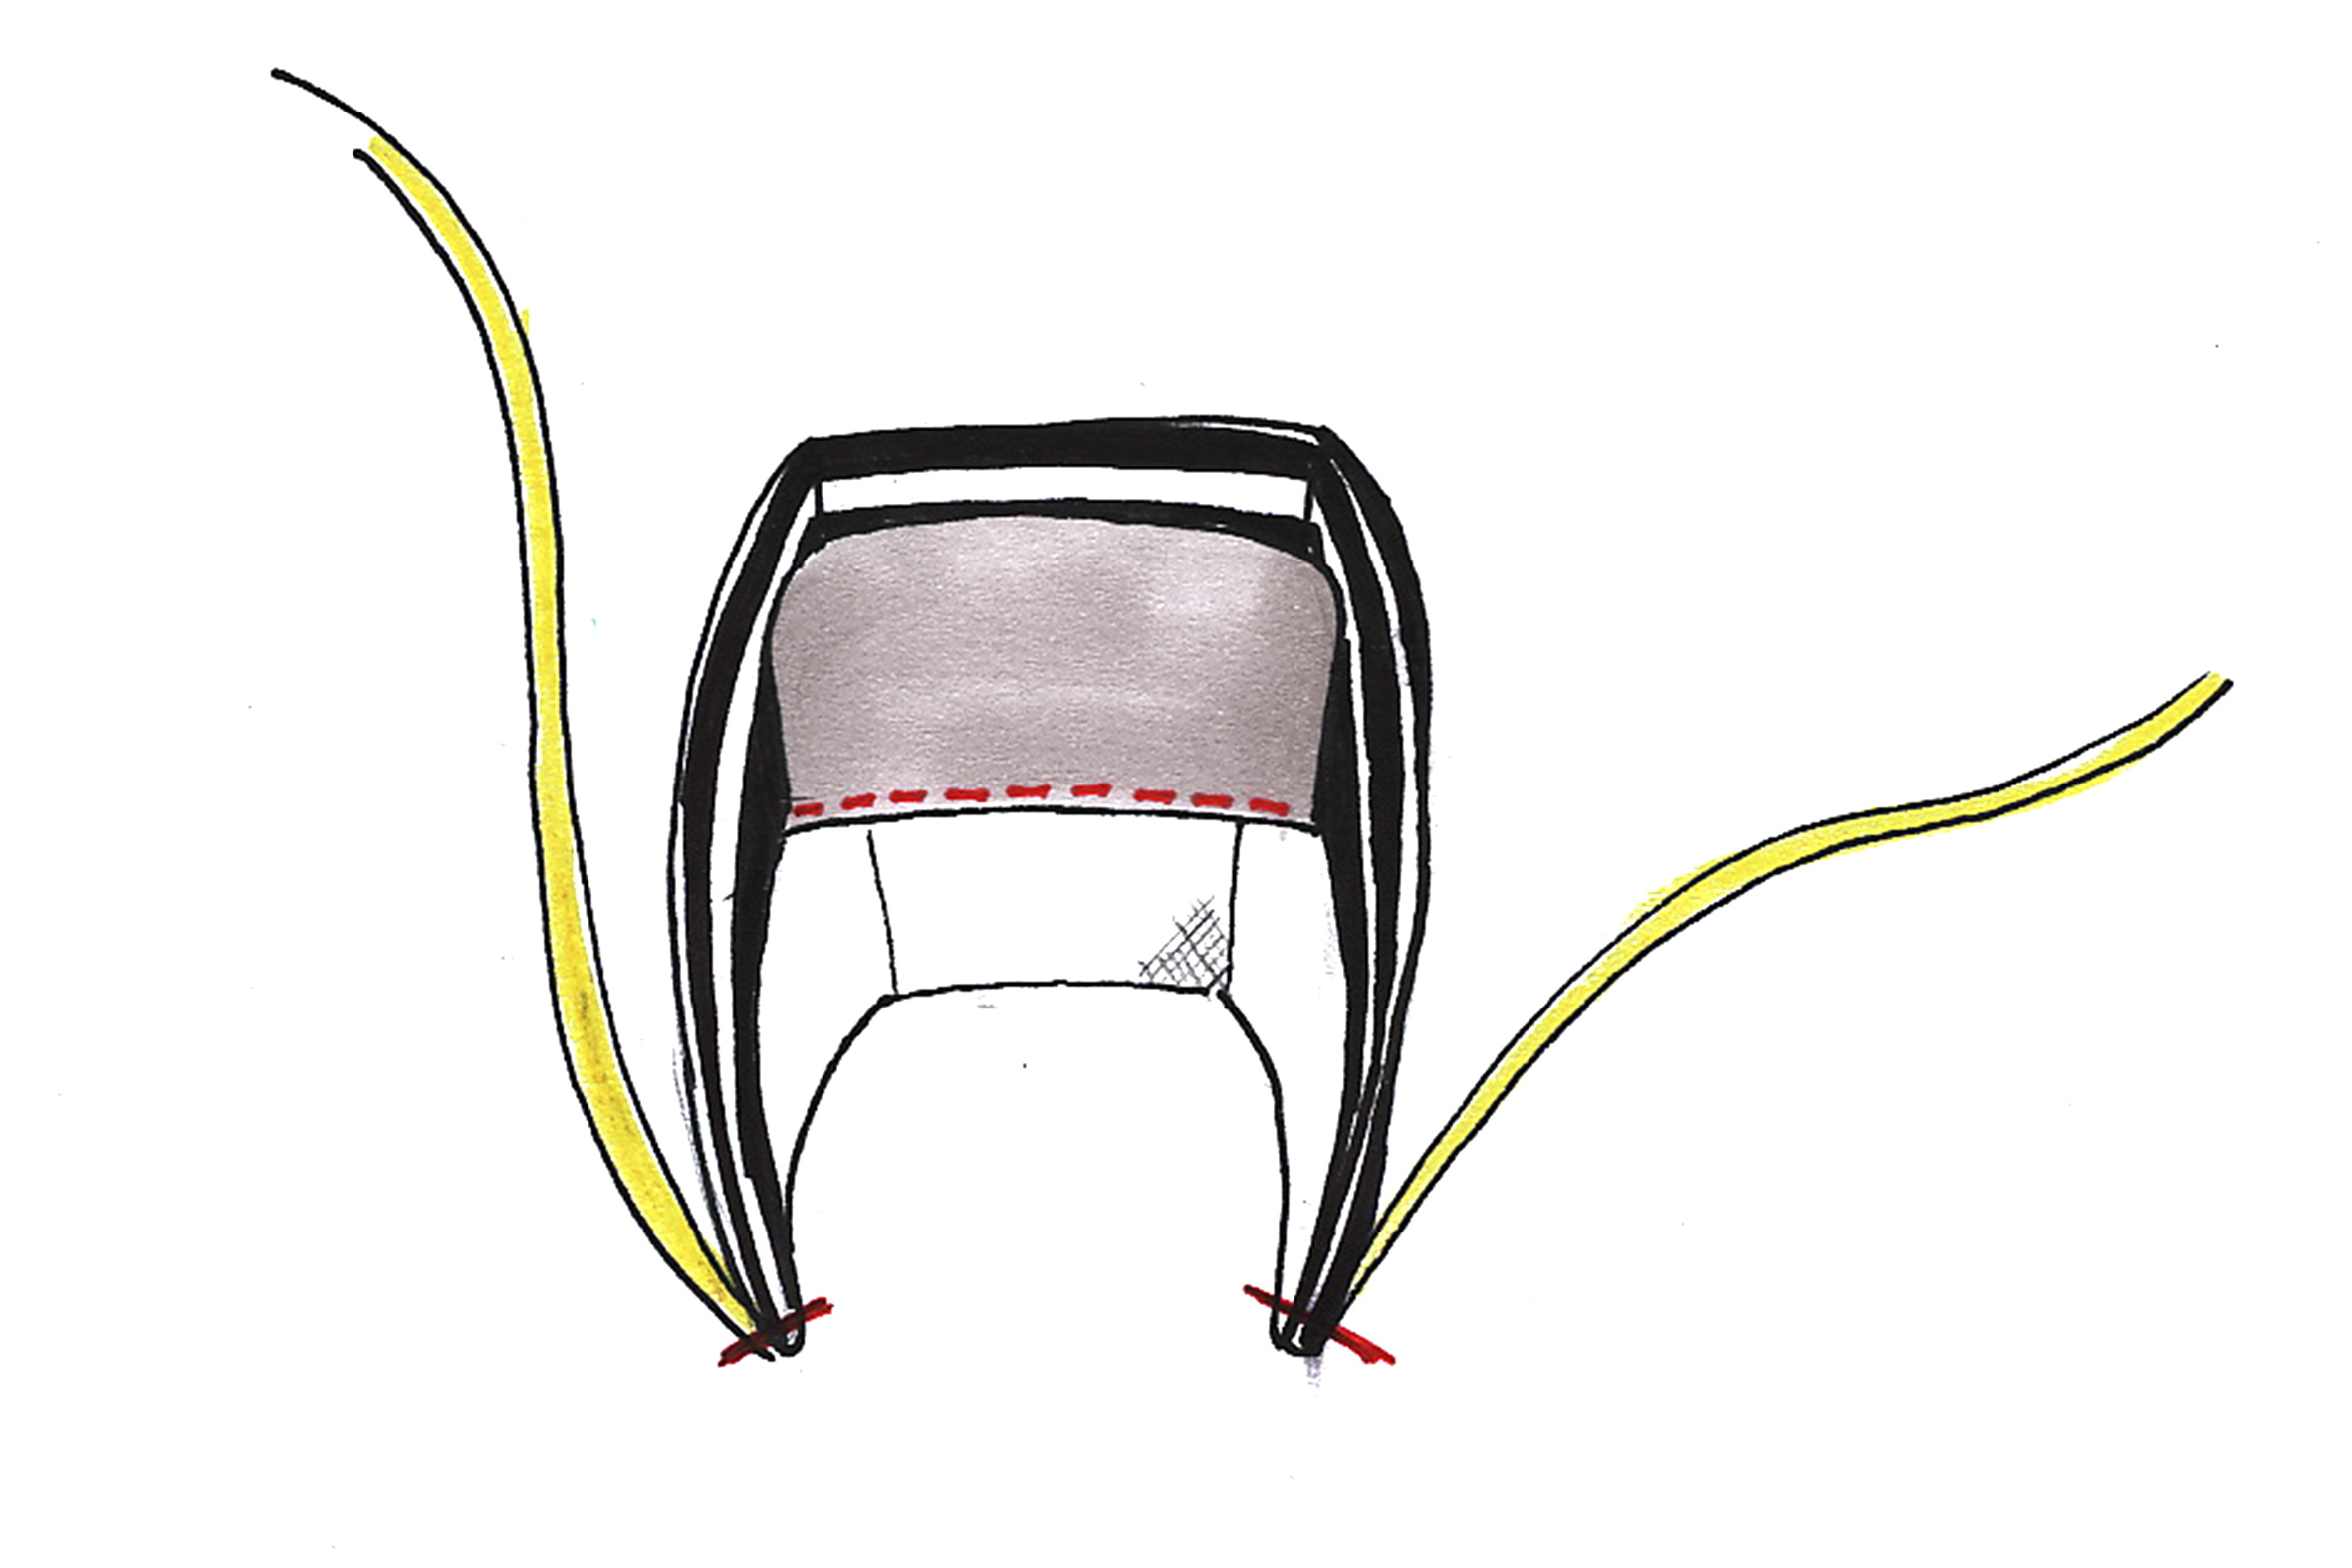
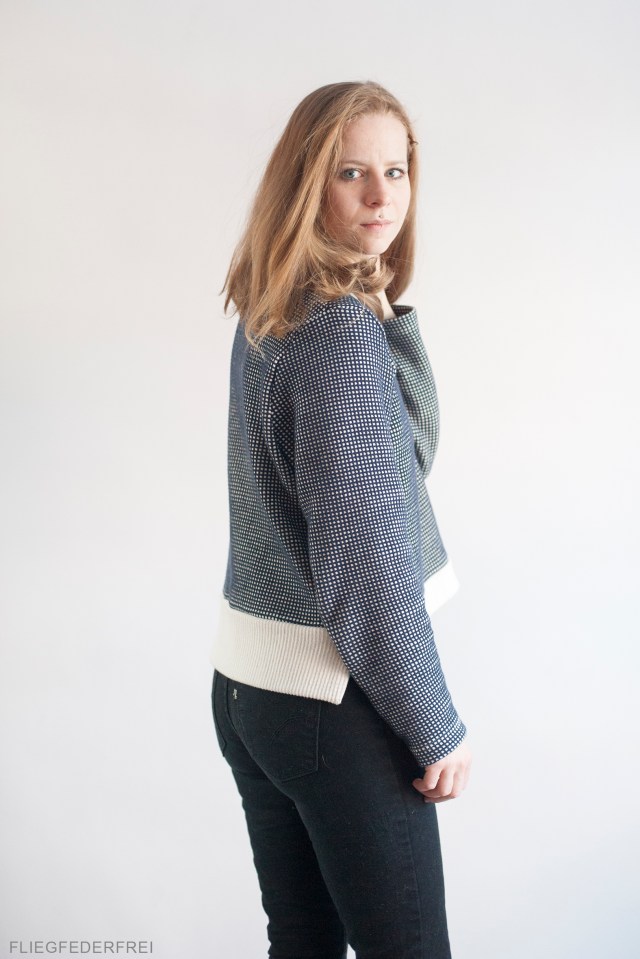
You may be interested in the nice split detail I added to my Inari sweater. I made you a Tutorial.


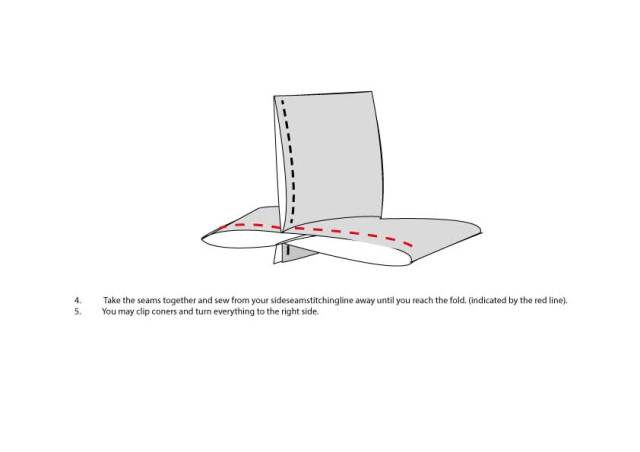
SPLIT HI-LOW HEM TUTORIAL


split_hem1split_hem2split_hem3

waffle__005

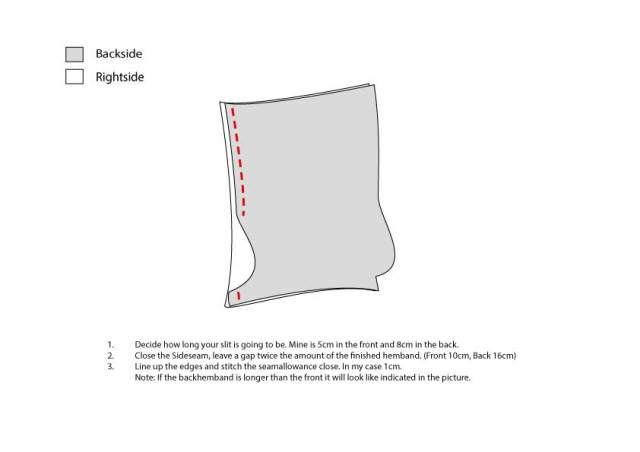
I used the Inari cropped tee pattern by Named. I planned to try out the free long sleeve. With my fabric it didn`t work. The sleeve was really baggy. Maybe because of the weight of the Waffleknit. I seamripped it out again and went for the short sleeve pattern piece which comes with the Inari and just lengthened it to my measurements. Much better. The hemline is extended as described in the tutorial.

waffle__006

Mr. Fliegfederfrei wears a modified Finlayson Sweater by Thread Theory. A size S with extra length. The neckdetail is selfdrafted. Read more about his previous Finlayson Sweater here. He wears his handmade sweaters as soon as they`re out of the laundry. It`s so nice to sew for him.

waffle__007

I really like our new sweaters and I`m quite sure I would probably not have sewn two sweaters without the extra motivation of Project sew it. January was a success.

waffle__001

Flowers for the girls

martekleid__005

I allready gave you a sneak peek of this dress in my last post. Now i felt like I`ll have to dedicate it a proper post on his own. The Maradress was the first pattern released by Compagnie M and also the first Compagnie M pattern I sewed. I was even one of the Mara-contest winner (see more here). It was about time to show that dress some love again.

martekleid__001

I sewed a lullaby layette romper for my baby girl a few months ago, out of this gorgeous Liberty fabric. (That`s my baby girl when she was about 1 month old.)

liberty

Shortly after, my big girl requested a dress as well! There was just enough left. You don`t waste even a little piece of such a fabric, right? By the way, I received this fabric back in 2014 as part of the Parissewsocial sponsorship. It was generously given by Cousette. It`s probably one of the most perfect cotton fabrics I ever sewed with! This is quality that makes a difference!

martekleid__002

With that opulent flower print, it just had to be a bit princess like. I hacked the sleeve to a balloon sleeve, which makes it extra cute in my eyes. For those of you who like to give it a try. I made a graphics which should make it easy for you to do it yourself.

ballona%cc%88rmel

  1. Draw lines on the sleeve pattern as illustrated.
  2. Cut it as illustrated and spread it open. The more you give, the more Volumen you`ll get.
  3. Take the new outlines as your new pattern-shape. Make sure you transfer notches.
  4. Gather the sleeve, so the new pattern fits to the armscye.
  5. Add an elastic to the hem. (Don`t forget to add Seamallowance for that!)

That`s it, you just made a balloon-sleeve.

martekleid__004

Add some pockets and snaps to the yoke and that`s everything you need for the perfect summer dress. She still wear it of course, just with a few more layers. But that fabric really goes with everything and makes every outfit a tad special.

martekleid__003

Pattern: Maradress by Compagnie M and Lullaby Layette by Oliver and S

Fabric: Liberty Mitsi nougat


Honeycomb Smock Dress – Tutorial

DSC_3203

Haute couture for a baby? It feels alike. Just kidding. In a way it`s like yoga for me. I love hand embroidering. It`s so meditative. The same stitches over and over again, while you let your thoughts fly. I think that`s the reason why I spend a few hours embroidering a baby dress.

DSC_3198-3

But look at this beauty, totally worth the effort, don`t you think? Hand smocking is an all time favorite. It gives the fabric a structure. And if you do it like me, on a small repetitive swatch, like a gingham, it changes the pattern in a very interesting way.

DSC_3263

The dress is self-drafted. I`m exploring the possibilities of gathering fabric. Smocking is a good one. It adds a little stretch to a woven fabric.

DSC_3232

DSC_3269

That`s a vintage button of my stash. Always a pleasure, to find the perfect one in my collection. I just lined the back bodice. The wrong side of a smock is nearly as beautiful as the front. I didn`t want to hide it. The armholes are finished with a very narrow bias-binding.

DSC_3235

Wanna try it yourself?

Here is the tutorial for Honeycomb Smocking

Continue reading

Earflap Cap – Free Pattern and Tutorial

Hut_003

It`s about 2 Months ago that I promised to share my Earflap Cap Pattern … I know, I know… . Better late than never. Yesterday we got snow again, that was my reminder. Here we go…

Hut_001

I just love this cap, she wears it nearly every day. It holds her ears cozy and warm. If you`re in a hurry, you can sew up one in about 45 minutes. It`s an easy and fast project. Perfect, if you need a last-minute baby gift.

I`m not an artist, I don`t know why, I felt more like drawing this tutorial, rather than taking pictures. But I was in a mood. Hope that works for you.

Here is your pattern, be carefull not to scale the pattern while printing.

It`s for a head circumference of 46-48 cm. That should fit a baby from 12-18 Months.

1.Earflap-Cap_001

Note: This is a pattern without seam allowance. You may add 1 cm.

2.

 Earflap-Cap_002

Sew the side pieces to the middle piece. Right sides facing (RSF). Do the same with the lining fabric.

Sew the flap RSF together, crop the fabric around the curved edges. Turn right side out. Press.

3.Earflap-Cap_003

Baste the flap and the straps to the seam allowance of the fabric.

4. Earflap-Cap_004

Sew fabric and lining RSF together (flap and straps should be between this two layers!). Leave the middle part in the back open (as indicated in the drawing). Turn right sides out, through this opening.

5. Earflap-Cap_005

Sew the opening close. Sew the flap to the cap, with a few hand stitches.

Congrats, your done!

That`s how it should look like…

Hut_002

share your procject with me… I would love to see your Caps.

https://www.facebook.com/fliegfederfrei

Dad`s button down

Image

My dad, donated his old button down. He wasn`t just happy about the deal. He expressly underlined that he still wears this, at least once a year. But, hey dad, look at that. Isn`t it darling? I think he`ll be pleased with the new utilization.

Image

I like it from the back view. I went for ruffles. If you know me better, you`re conscious that, it isn`t really my thing. But, when it comes to ruffles, I like them big. Because baby`s skin is so sensitive, I needed something to cover up her shoulders. And it adds an extra pop of color.

The straps are ending in a bow, looks special, but it`s so easy to do!


Because I love to refashion old stuff and I think it is important to go easy on resources. I wanna show you, how to do it yourself. It`s quite easy. And it`s simple to make it your own. ImageImage

I think everybody has a disused shirt. It`s so fun to reanimate it for your little one.

Linked up at

So let`s go! Here comes the tutorial Continue reading

Baby Bandana Bib Tutorial + Free Pattern

Bandana8

I used a ton of baby bandanas since my baby is here. They`re so useful and look really darling. I became one as a baby shower gift. I didn`t want to buy a few more, so I drafted a pattern and sewed them up myself. Today i wanna share my pattern with you. They`re tried and trusted by me.

You`ll need

ImageI use knit fabric. It`s soft and nice around baby’s neck. But it`s also possible to sew this bandana bib in a woven fabric. You want need a lot of fabric. It`s a great project to use your scraps!

1. Rights sides facing

ImageFold the ribbon in half, place it between the fabrics. Attach it with a few stitches, so there isn`t any shifting while  sewing with the serger.

2. Lay your fabric under the machine

ImageI use my serger for all knits, if you don`t have one. Insert a ballpoint needle to your sewing machine and set to a narrow zigzag stitch. Stitch all around, be sure to space open to turn inside out.

ImageThat`s how it should look so far. Now turn, right side out. And press well.

Image

3. Close the space you let open by some handstitching

Image

4. Apply the velcro fastener

ImageThe small one on the outside right. And the bigger one on the inside left. If you do so, your bib is gonna be reversible.


ImageYour done! That`s it! Because they`re so fast to sew. I`ve got quite a number of those bibs. So I have always the right one to complete her outfit.

Image


Image

Download the Pattern here.