Plain Jane?

Print

The Battle of the Stitches goes into a second round. This time i`m going to take part! Olu of Needle and Ted and Toya of Made by Toya, it`s a pleasure to sew with you!

This round is all about the color grey. We`re all grey lovers and if you think grey isn`t a real color, has something staid and sad about it, I hope that we can change your mind. The subtle charm of grey is like a perfect stage for every other color. Plain and simple as I like it.

Toya and Olu having their first appearance on their own blog today, so hop over and give them some love for their bravery!

Drape_Drape_no5__002

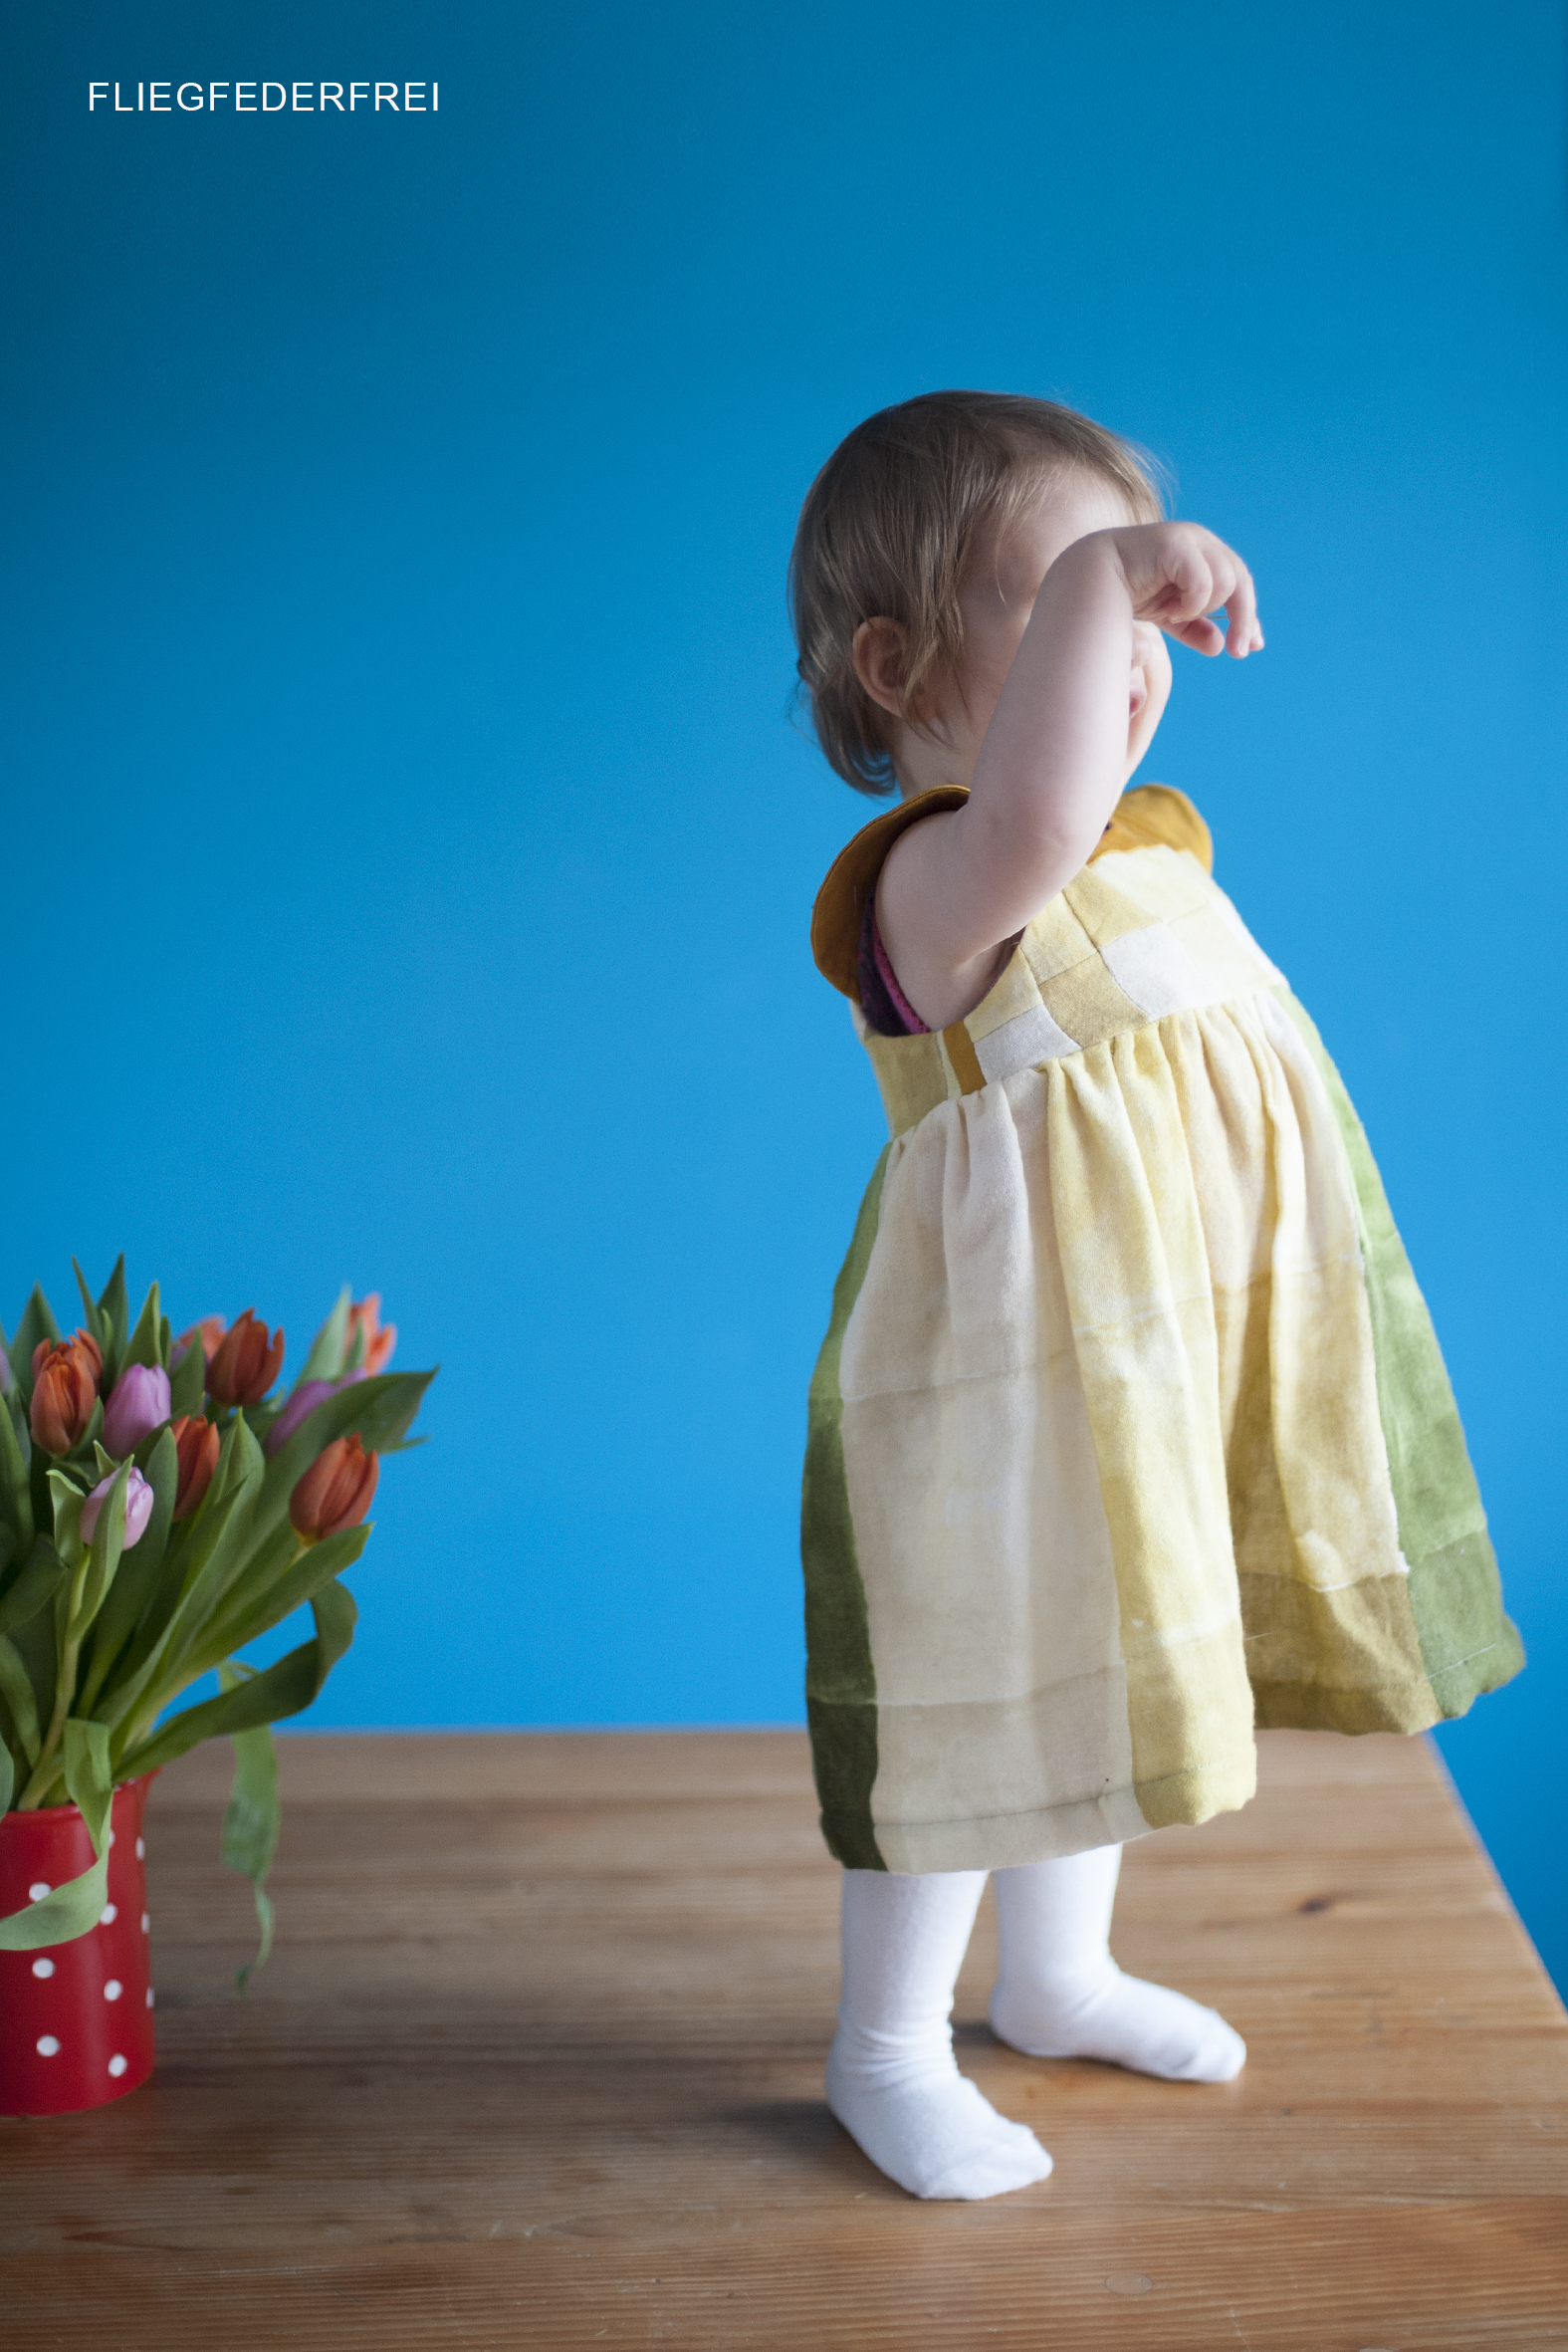
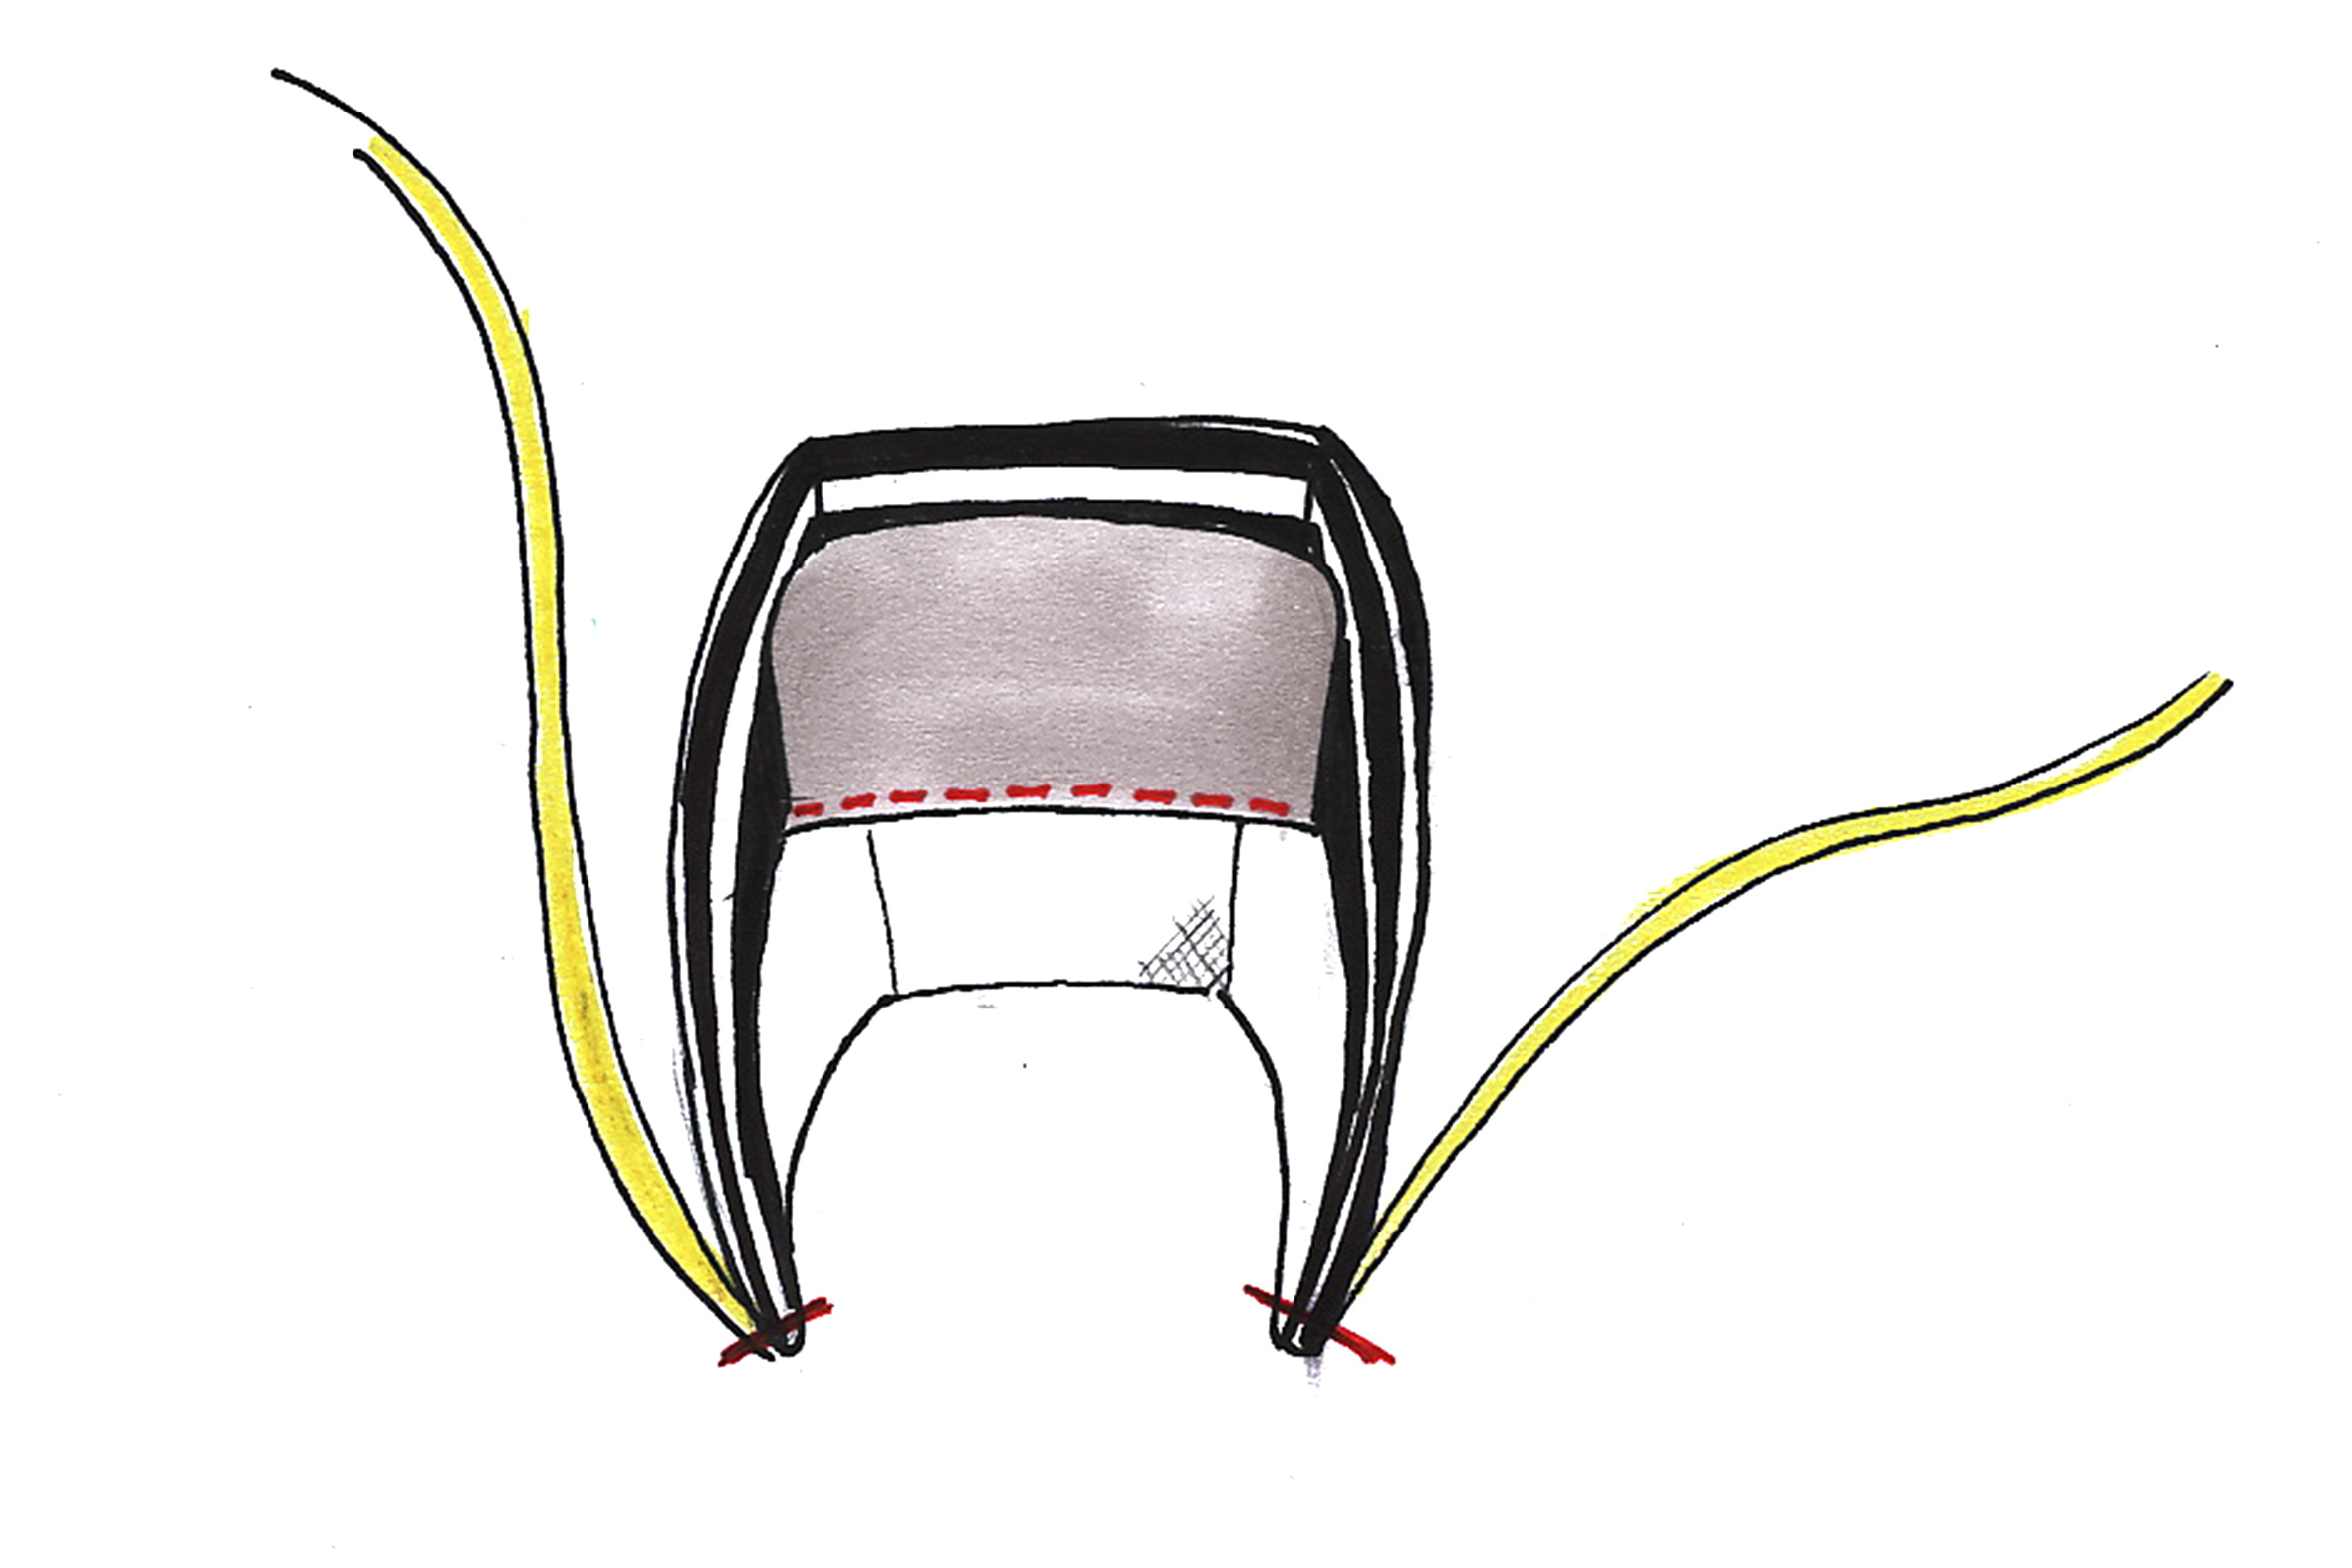
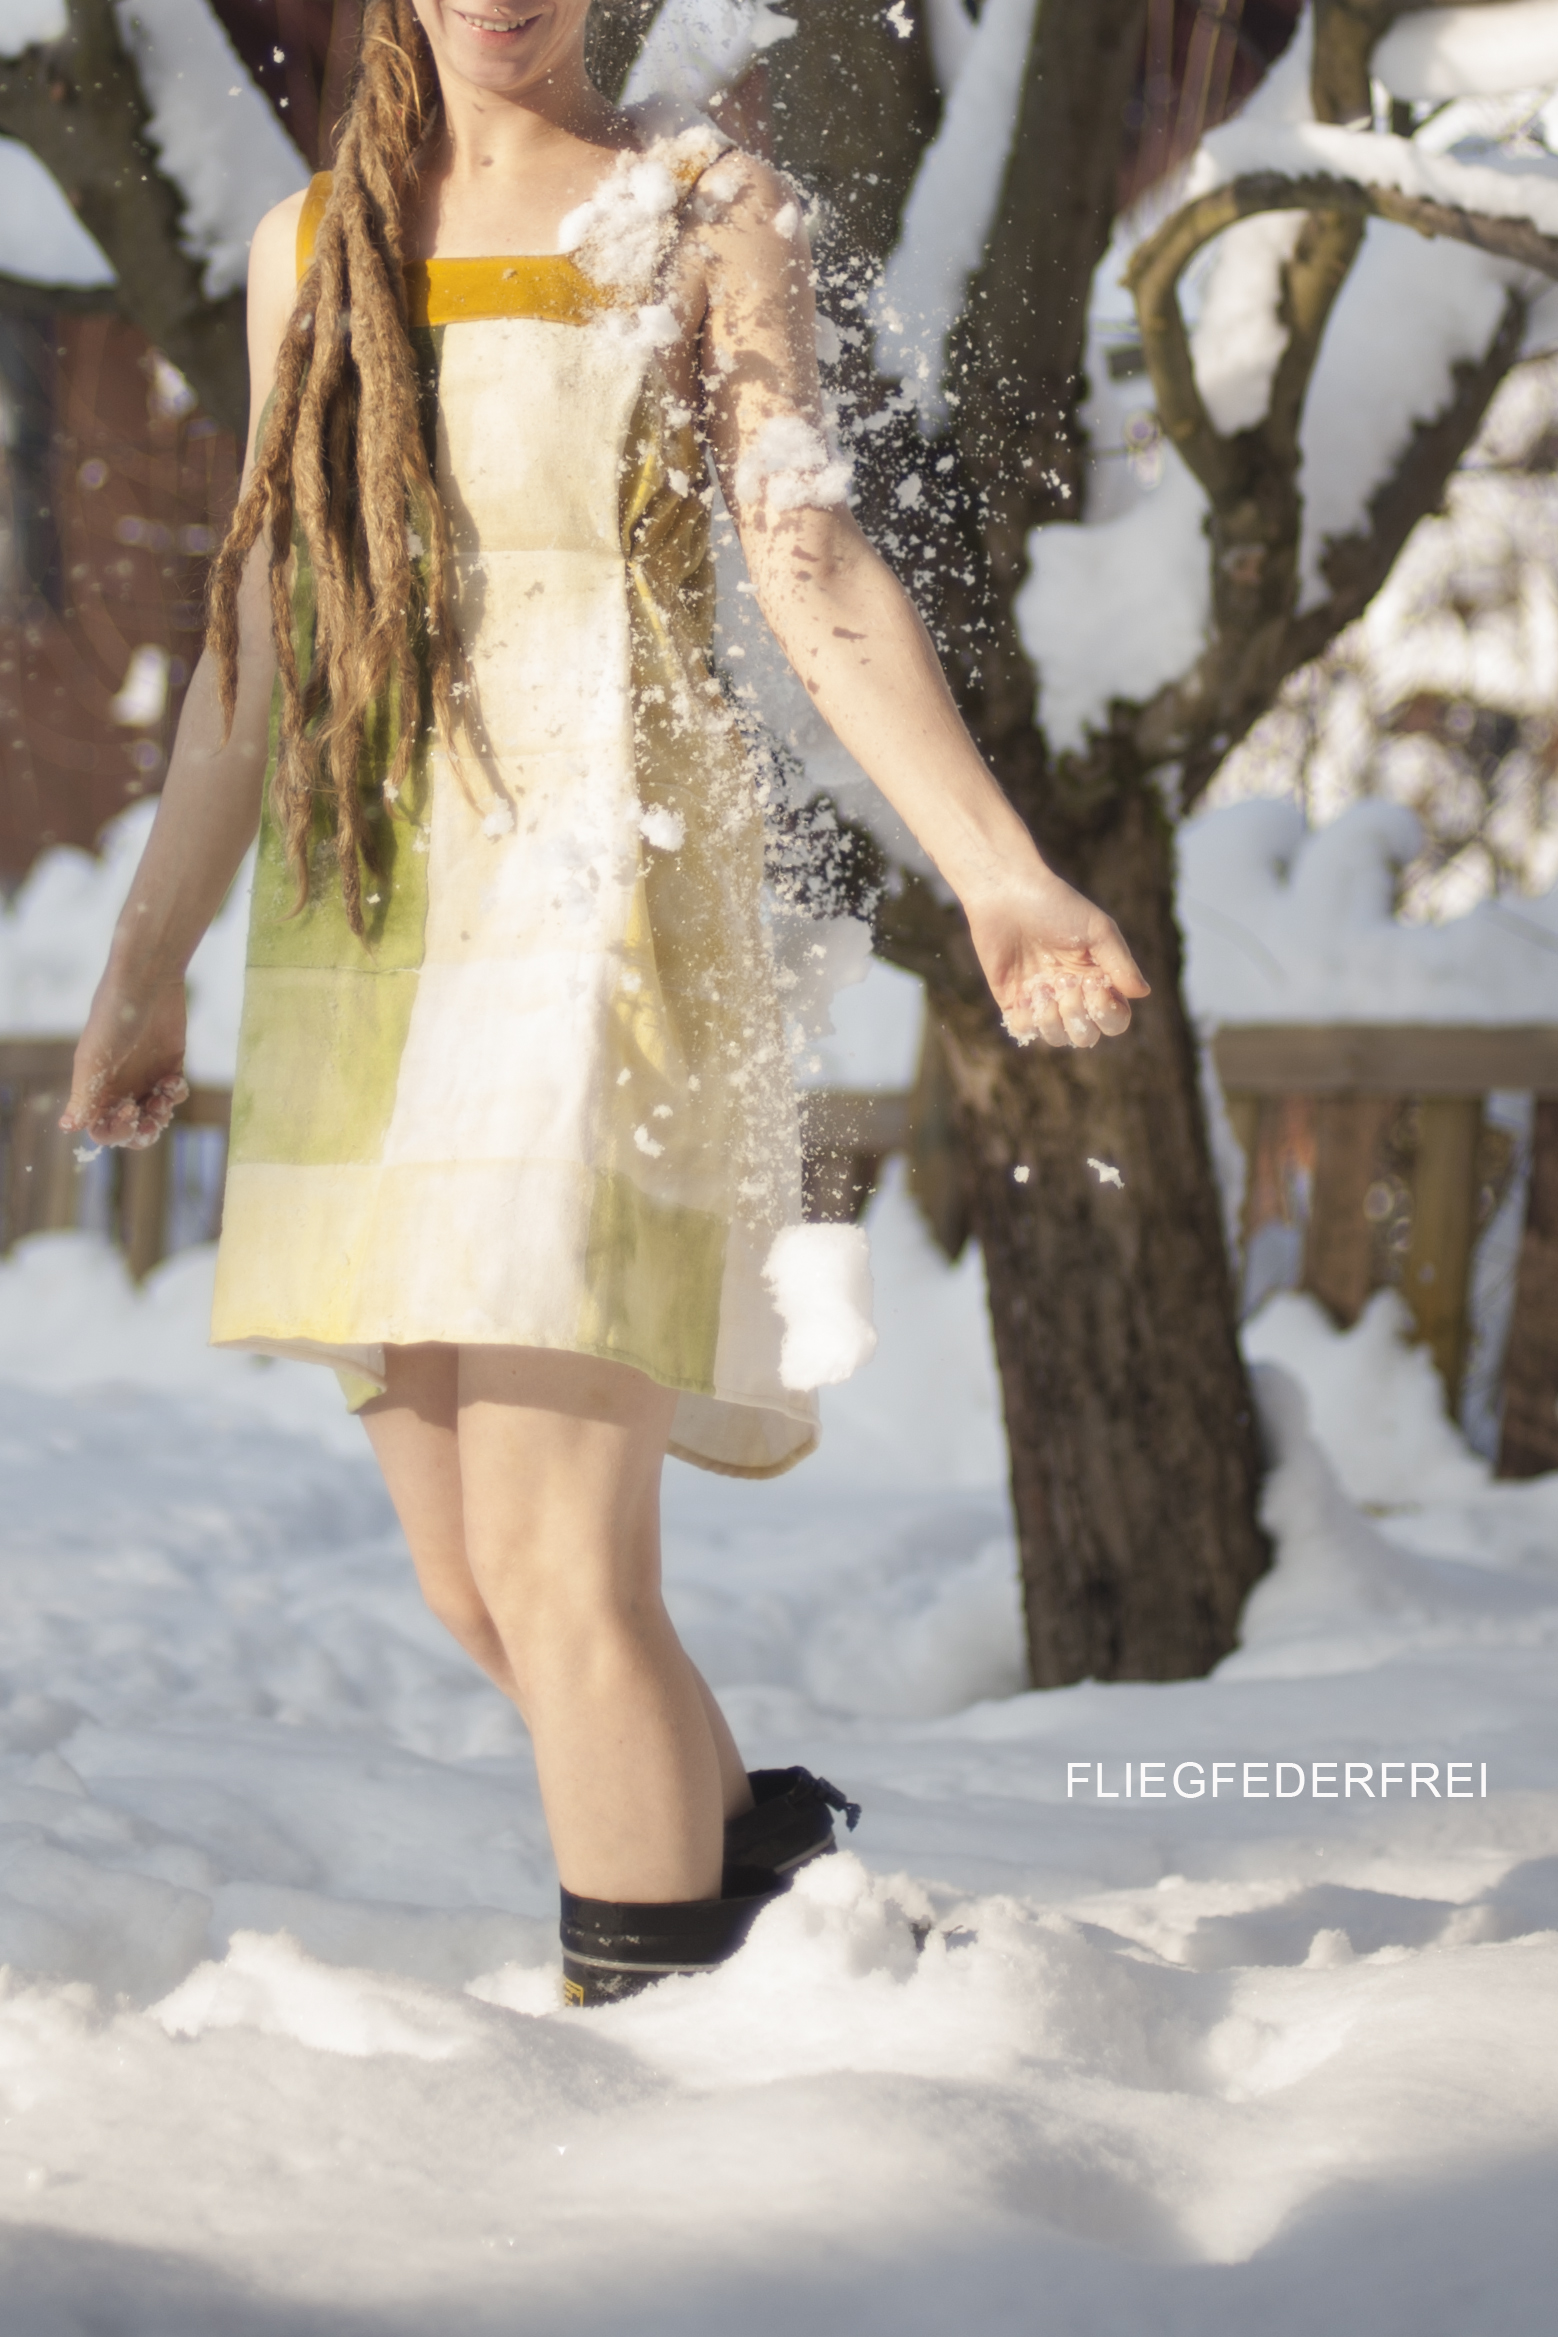
Let`s talk about my dress. The Pattern is out of drape drape. My favorite sewing book. Maybe, you can remember this dress. Most of the designs arise out of a single pattern piece. The fabric is laid in gathers and tucks until it wraps nicely around the body. A real art, but easy to sew!

Drape_Drape_no5__007

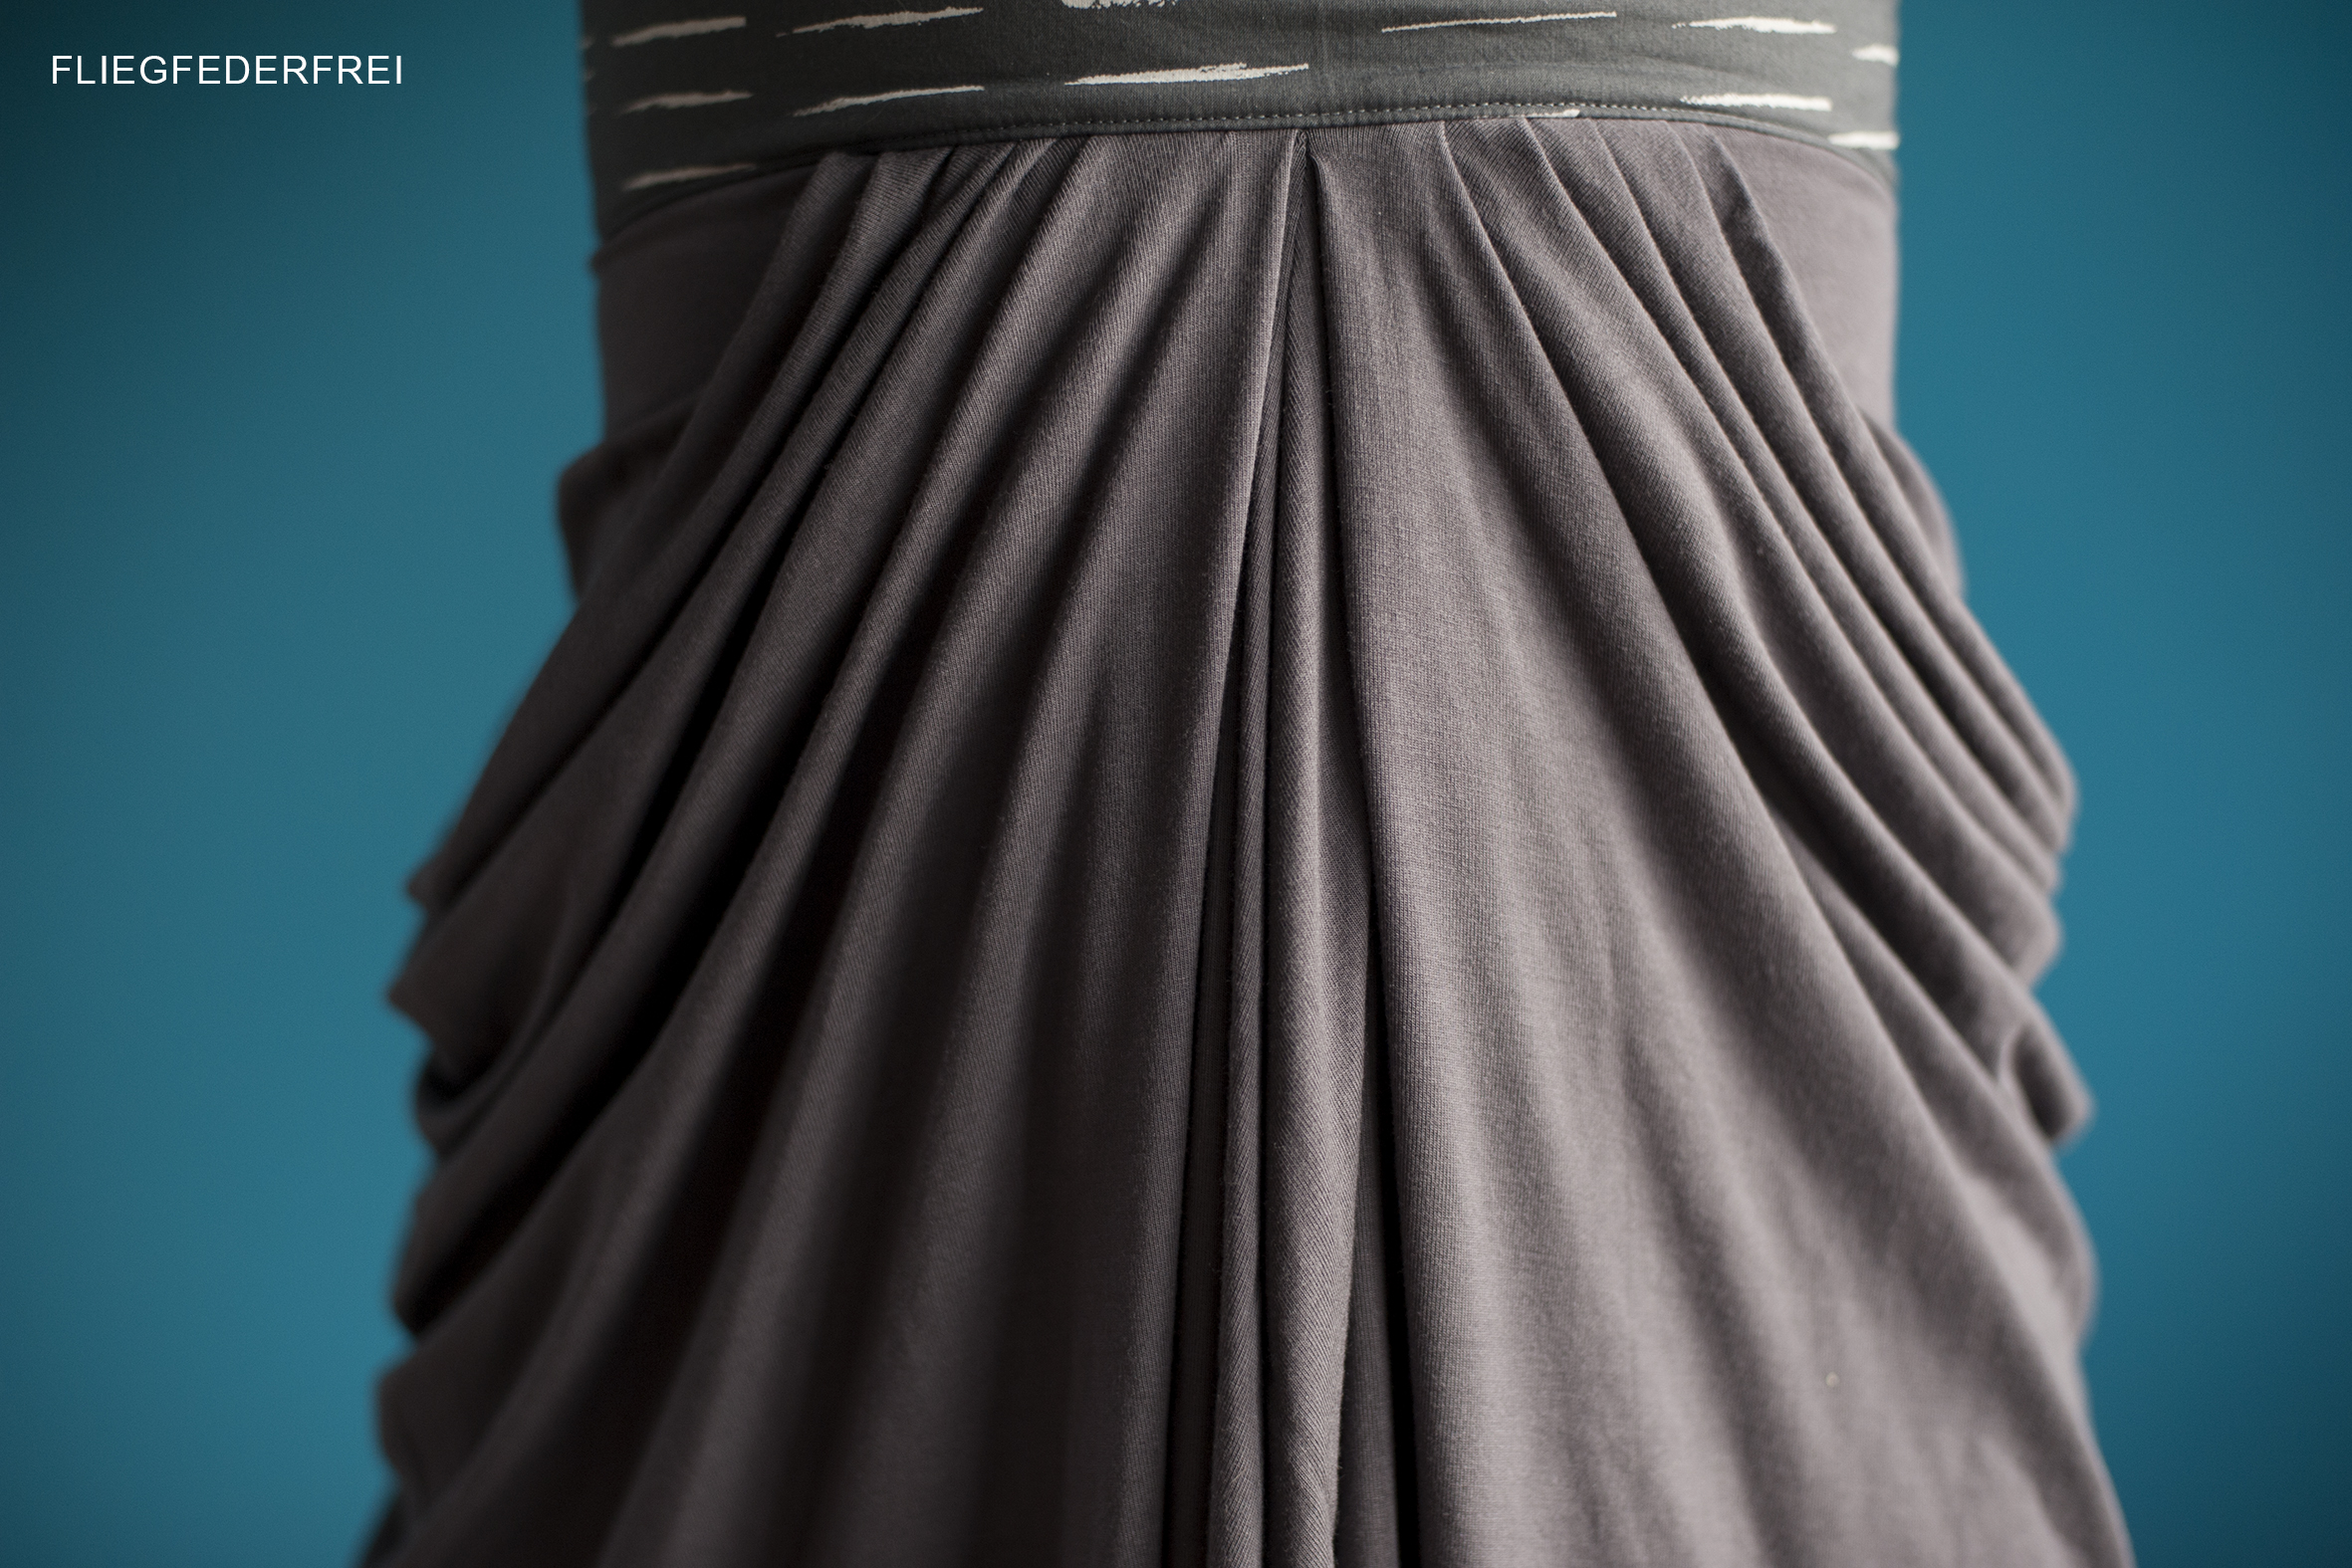
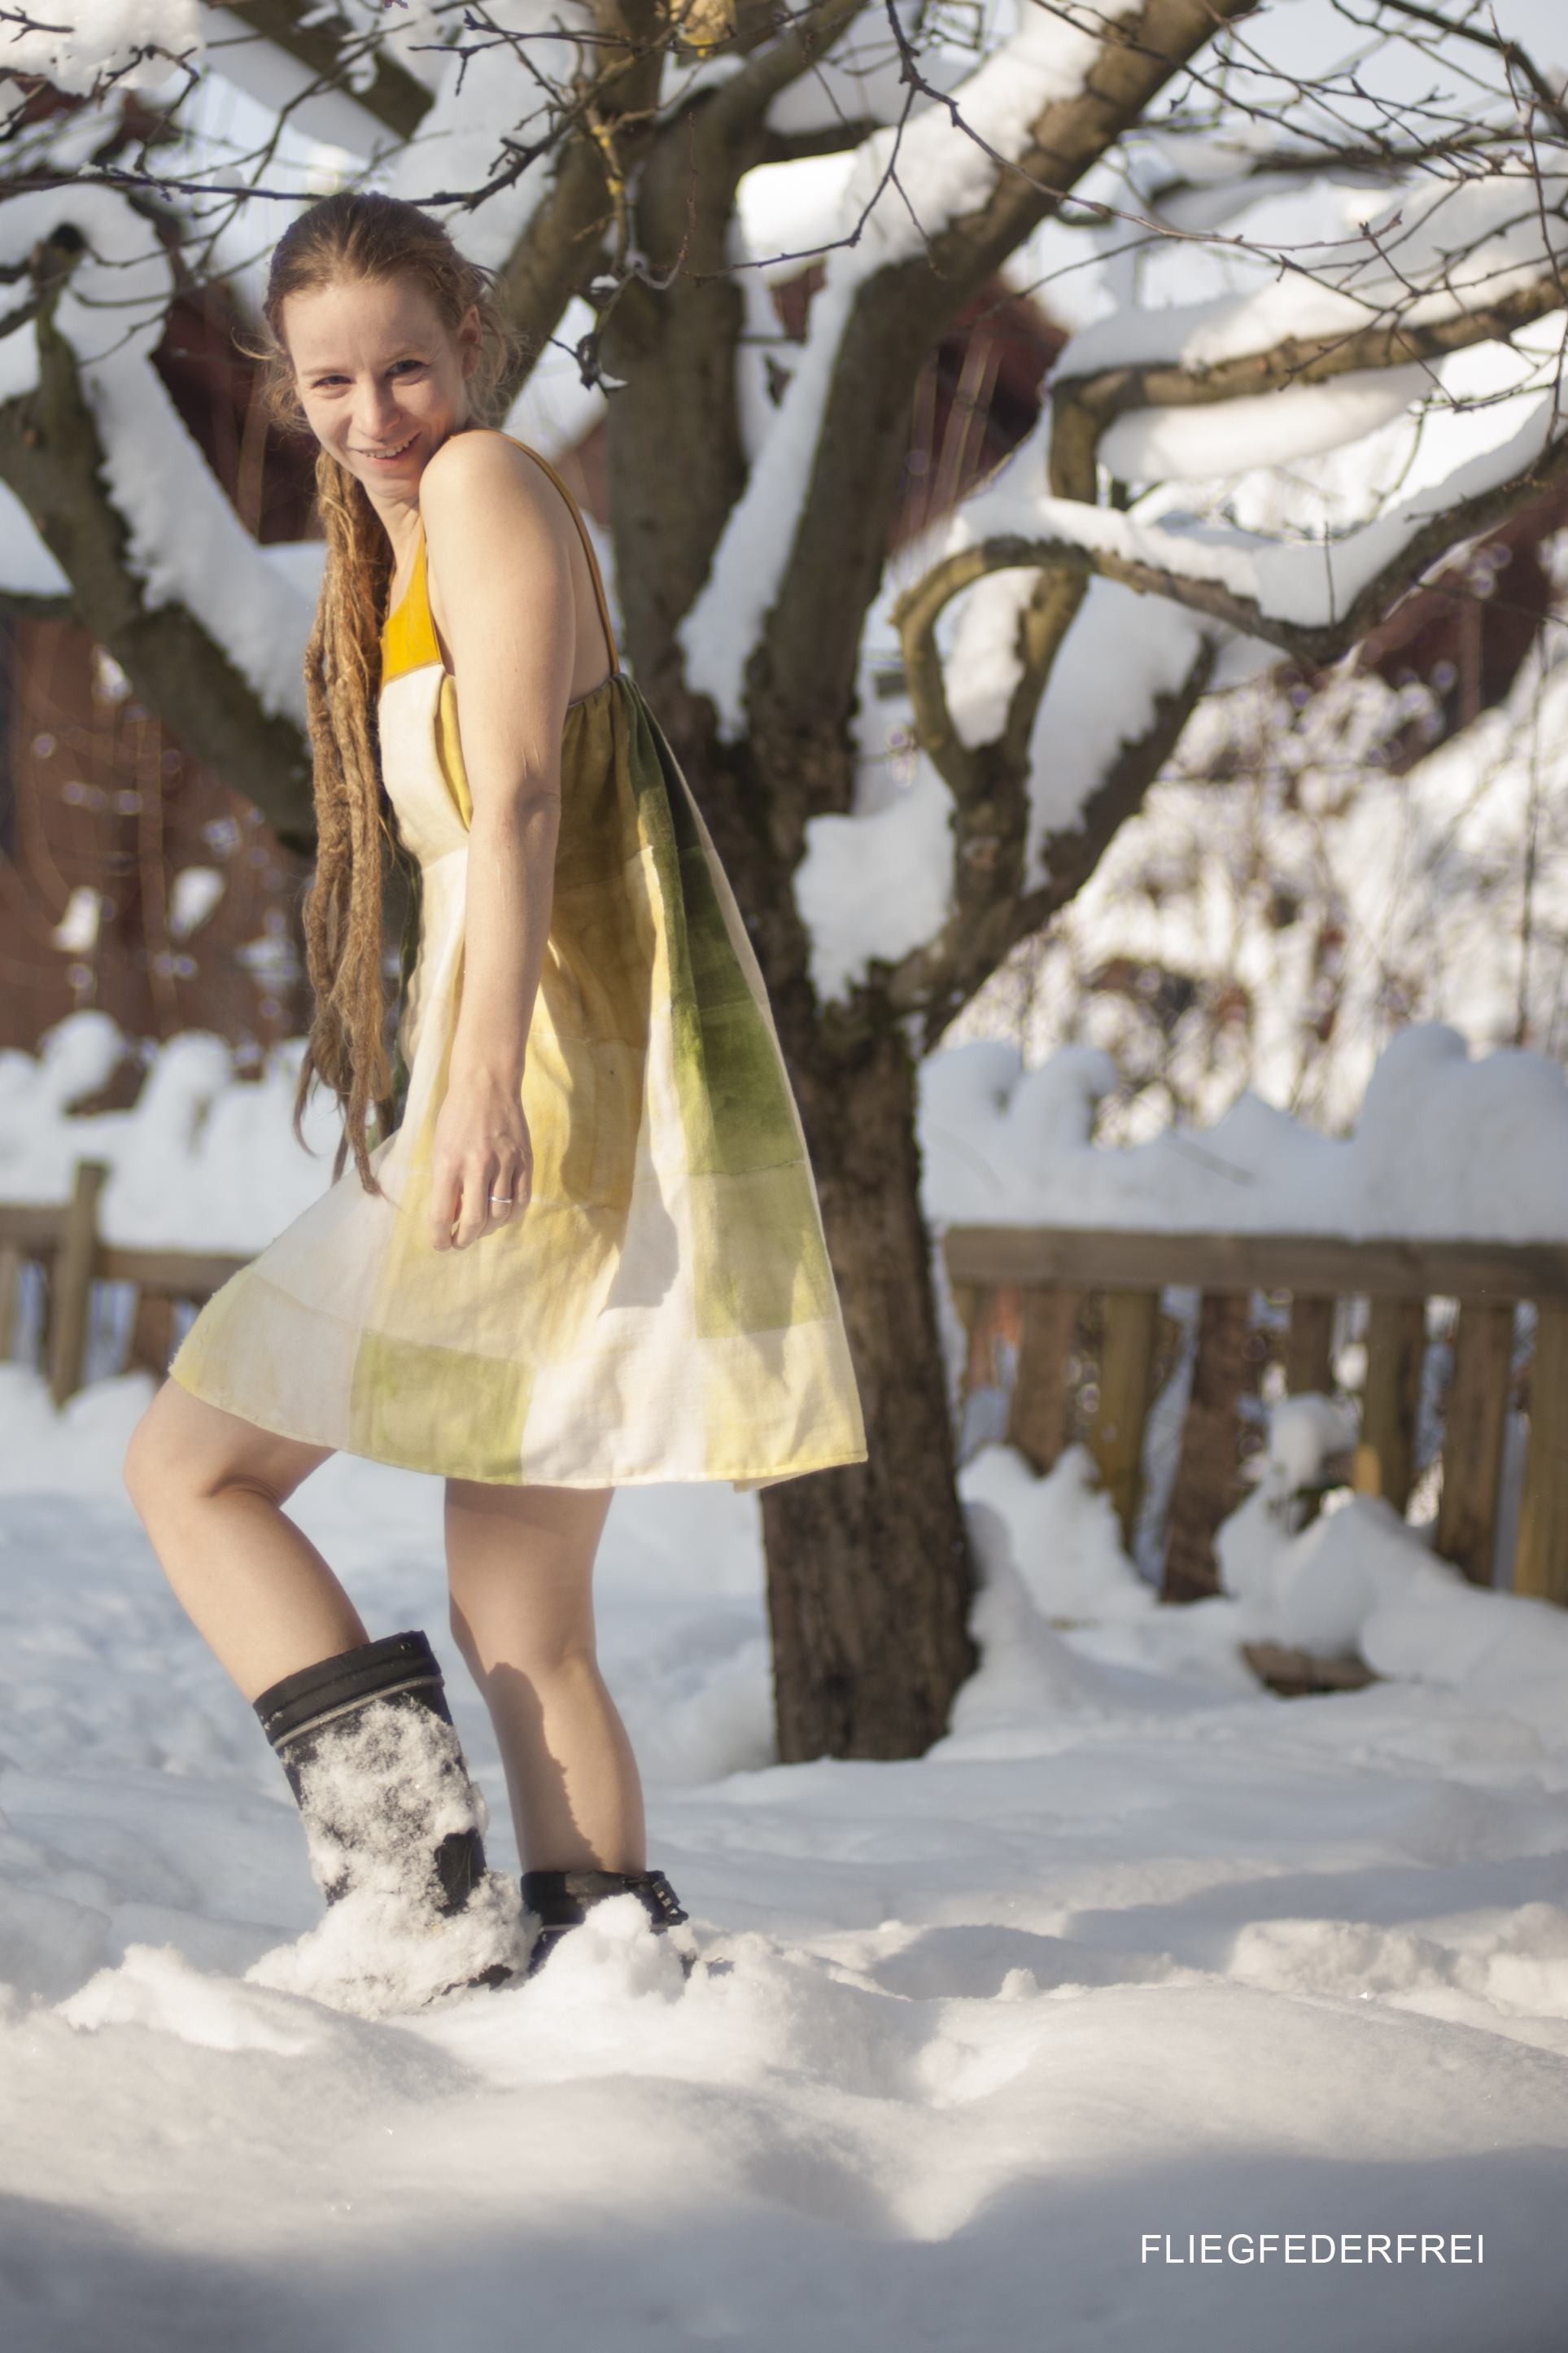
Fabric is Chalk from atelier Brunette. It`s a woven fabric and doesn`t stretch, so I had to pair it with a plain grey knit. The slackness of the fabric creates those beautiful loose drapes.

Drape_Drape_no5__001

I do not fear anything while sewing but this dress reminded me that I definitely don`t like to insert an invisible zipper. I had to take it out about 5 times (seam ripper you`re such a good friend!), until… I could call it okay. It still isn`t as easy to close as it should be.

Drape_Drape_no5__005

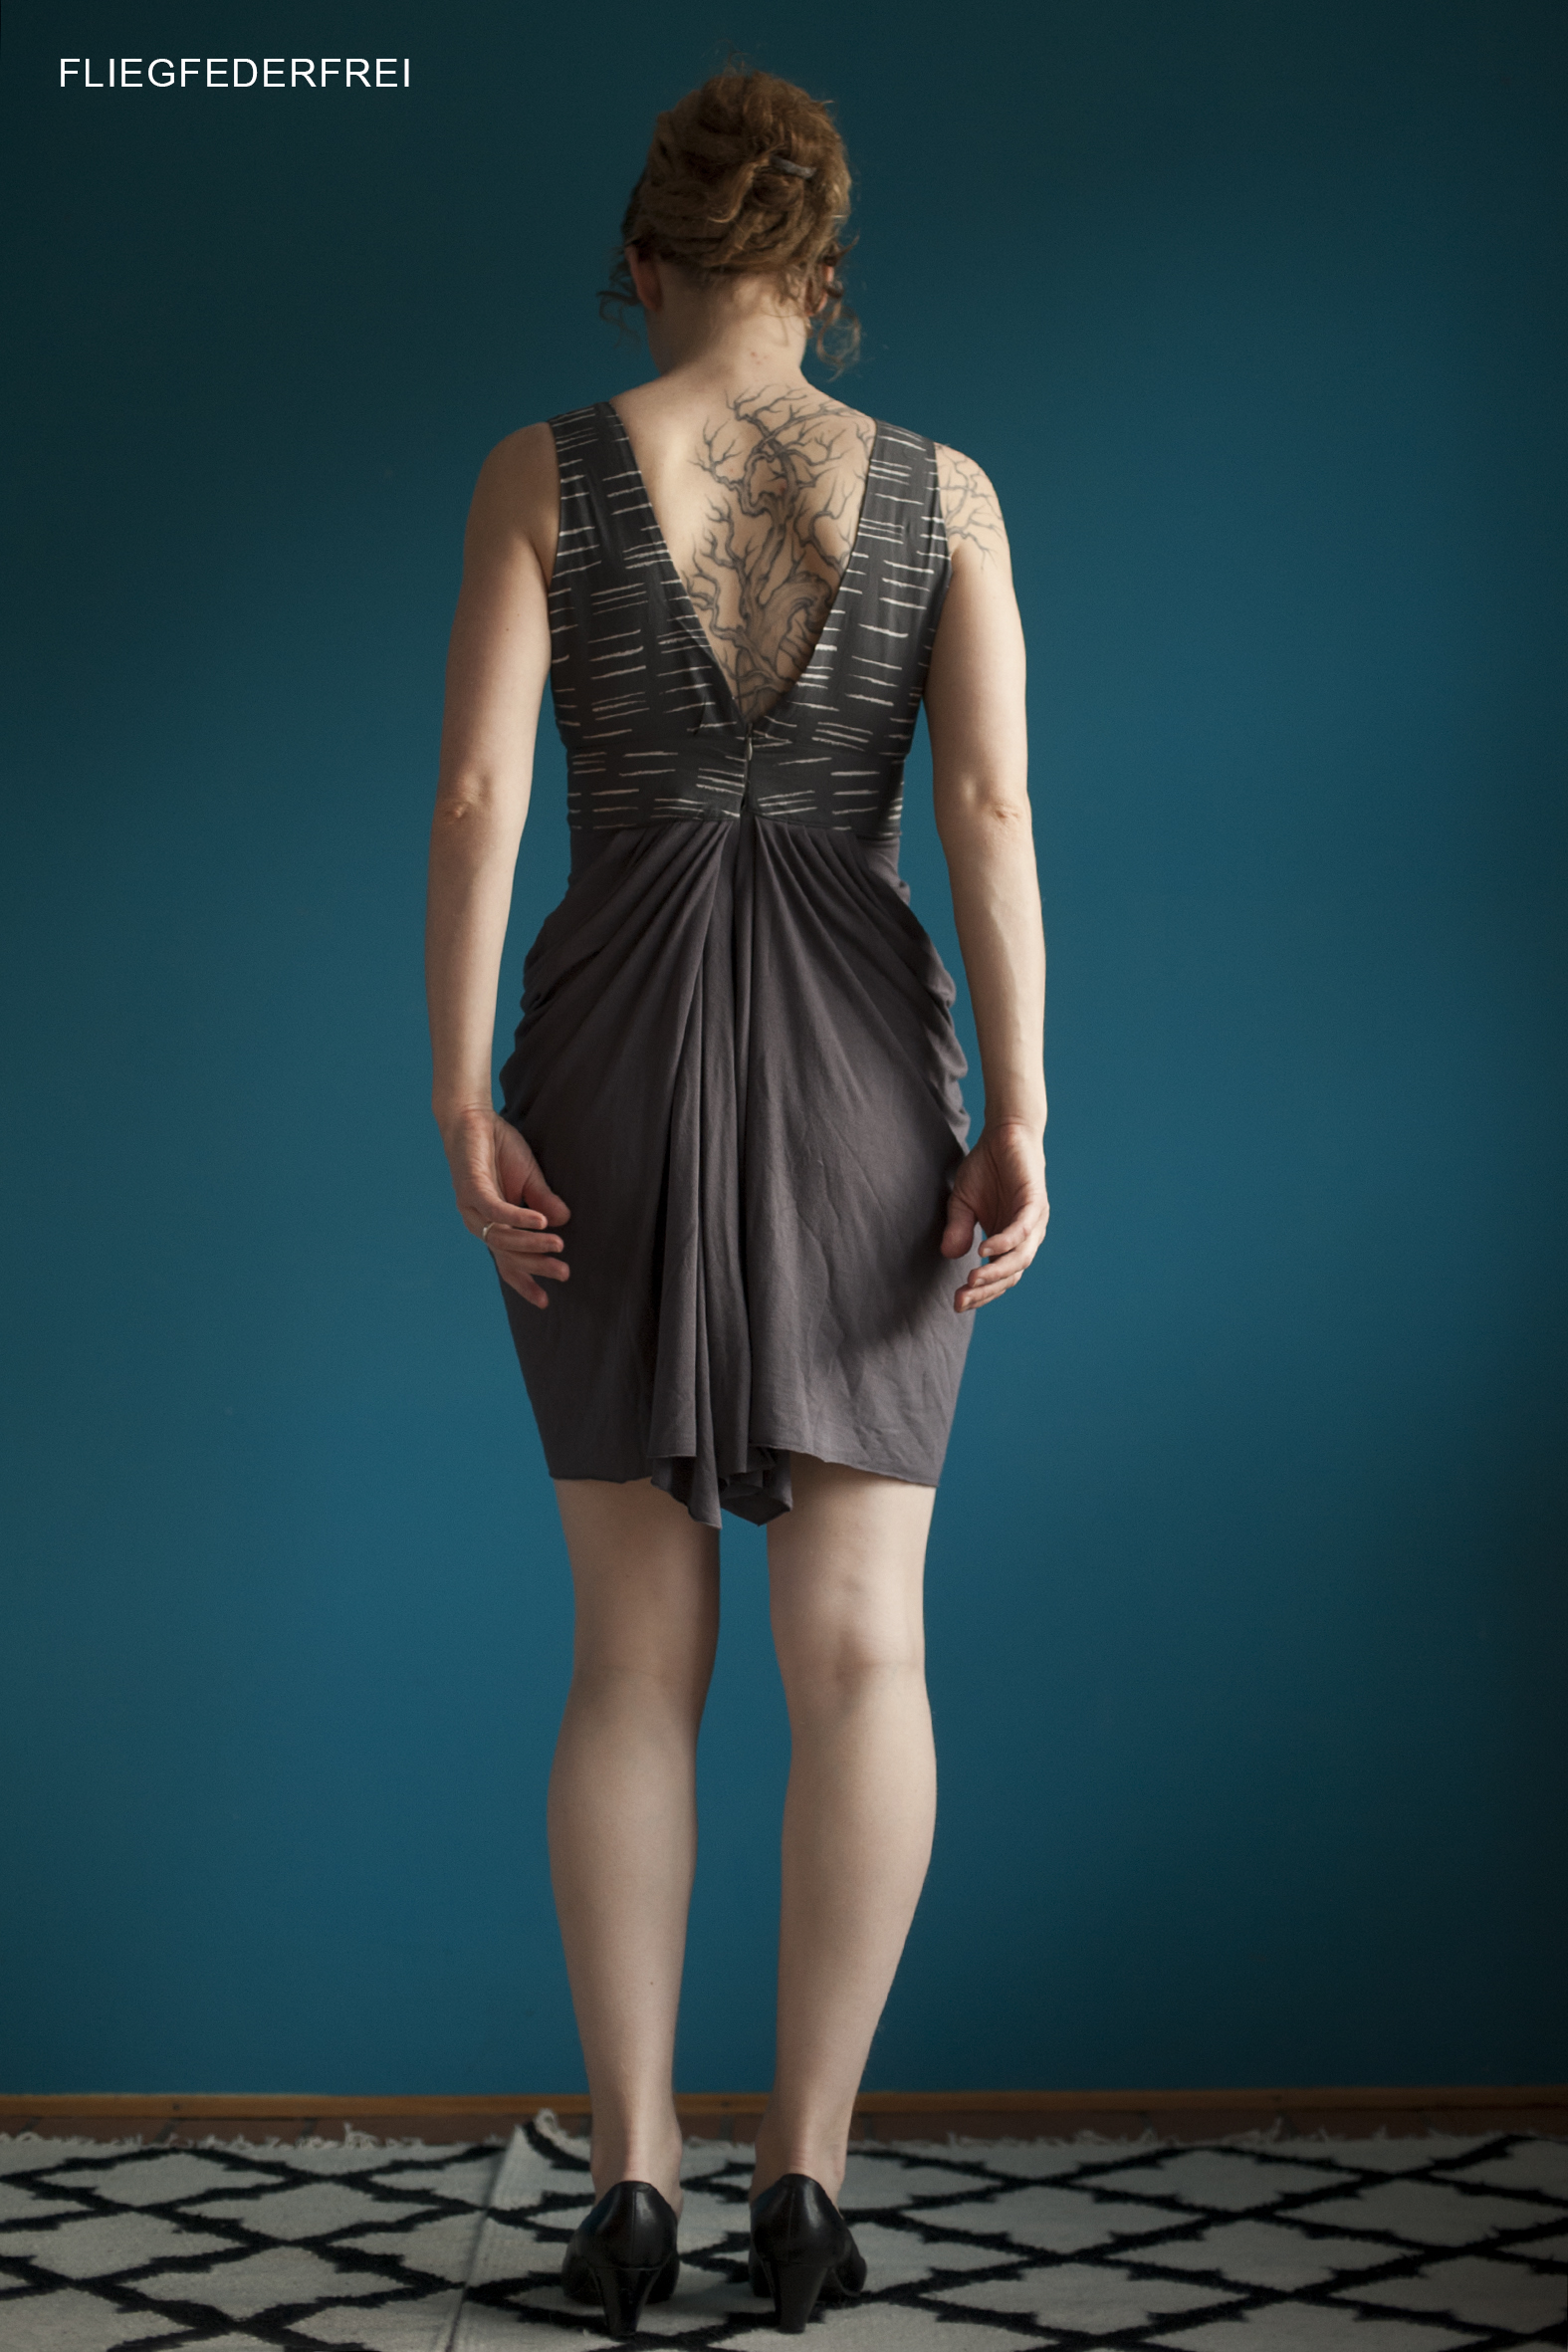
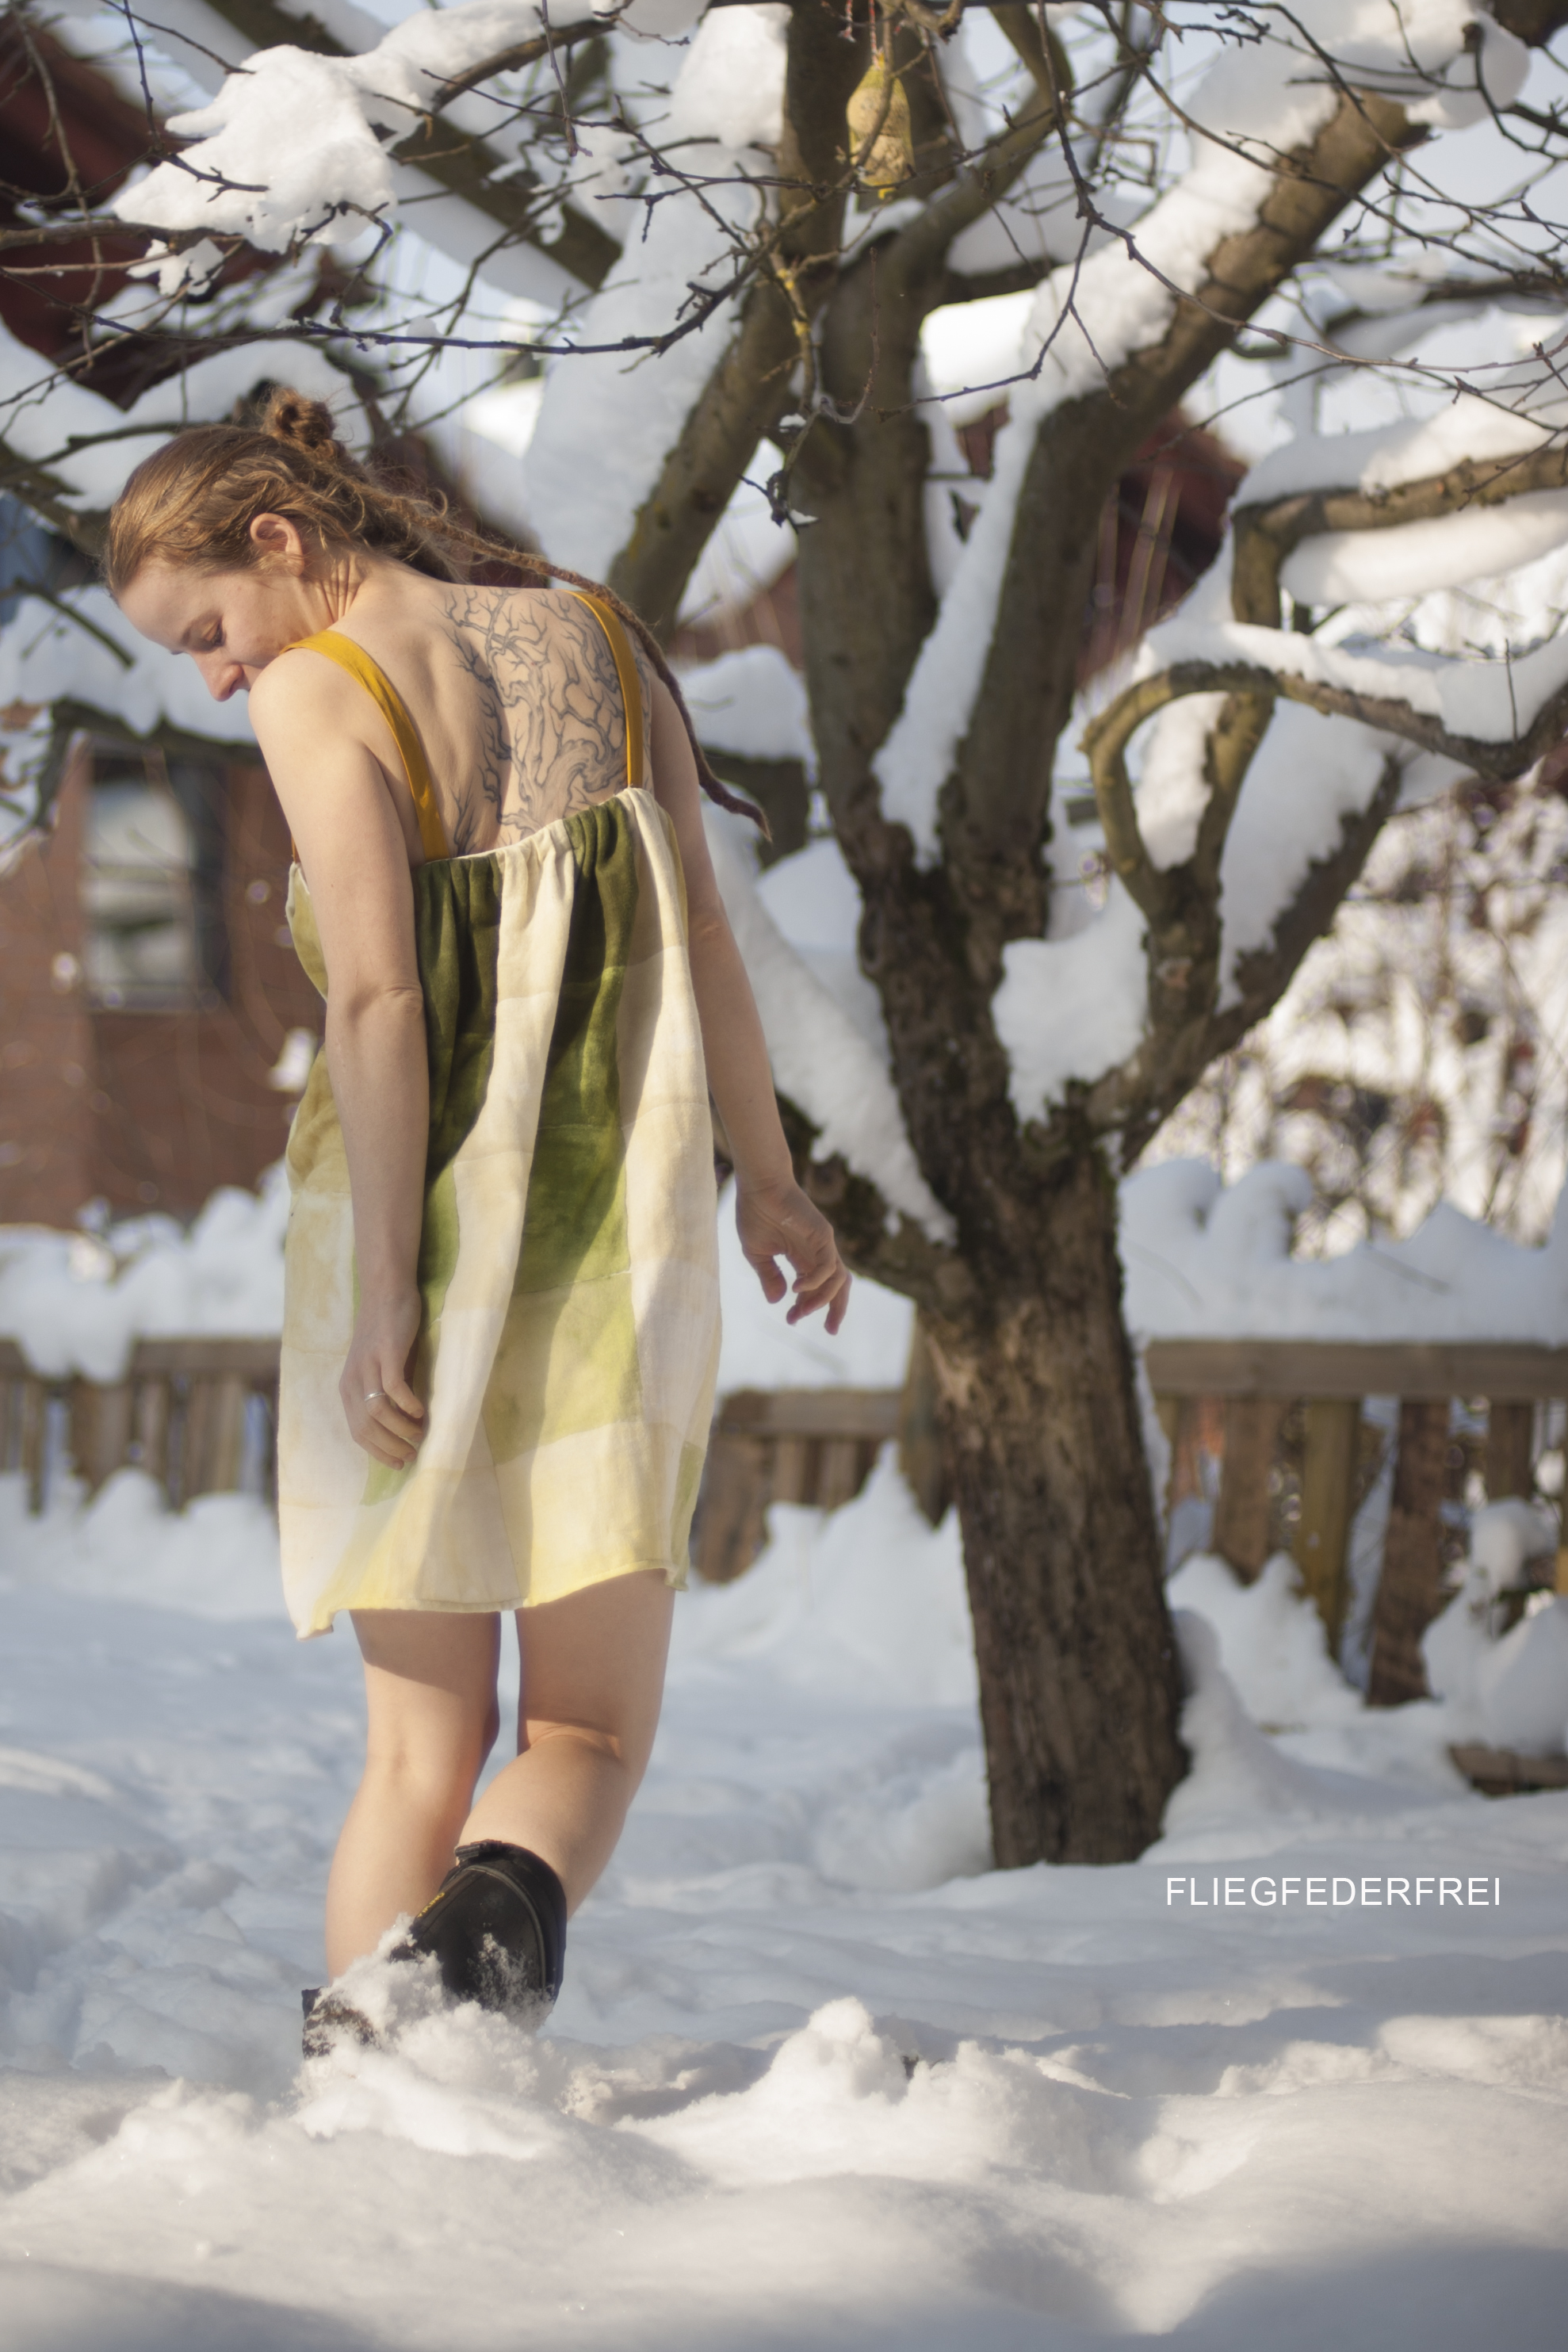
The design has a little train on the back skirt. While wearing it, I just wasn`t sure about it, and mostly if I`m not sure about something on a dress it makes me feel uncomfortable. So I just cut it off. I like it more this way!

I left the hem unfinished, my old problem of running short of fabric. I had to save those precious cm, to prevent me from wearing a skirt that would make me a little self-conscious.

Drape_Drape_no5__003

That`s my contribution. What do you think? Is it a plain jane or would you sew or wear a grey dress yourself? Let me know.

Drape_Drape_no5__006

Garçonne

Hudson_Pants_004

Who`d have thought, that grey wool pants can look so feminine? I felt in love with this fabric on a flea market, last sunday. It was a big ugly old trouser, but the fabric… just lovely. So I bought it. I immediately knew which pattern to take!

The Hudson Pants by True Bias. Even if they`re designed for knit fabric. It works perfectly well with woven too. I just cut a size bigger than I normally would.

Hudson_Pants_002

I mentioned previously, the fabric is upcycled. That`s the reason, why they are a bit too tight around the lower legs. There was just not enough fabric. Anyway they`re wearable.

Hudson_Pants_003

I guess you gonna see a few more Hudson Pants around here in the next few weeks. They`re a nice fit and a quick sew. And not to forget, they`re very comfy!

Hudson_Pants_006

A little photo bomber on his way. Can`t tell with words how much I love that girl!

Hudson_Pants_001

You probably already noticed, I added a little extra to the waistband. I think it adds a drop more elegance to the sporty cut.

Hudson_Pants_008

Spring fever

Fliegfederfrei_005

Spring…. I`m ready! At least, I made myself the perfect bomber blouson. Just in case, maybe it helps to get rid of the snow. Can`t tell you how I love this bomber. I didn`t take it off since I cut the threads to my machine.

Fliegfederfrei_002

The Pattern is from CUT Magazine (Issue 10, 01/14), it`s drafted by a young and hip german label, a kind of guise. They`re located in Munich.

Fliegfederfrei_001

Usually, I don`t bother myself reading instructions. I learned to sew with Burda (you know what I mean?). But when I had a look at the tutorial it seemed like I wouldn`t get all this pieces together myself. So I just followed their way. And it was so worth it. The finishing is perfect. I learned something.

Fliegfederfrei_003

I used my serger for the whole piece. I`ve no regrets about buying a good serger (even if I spent all my savings). Perfect seams, always.

Fliegfederfrei_006

Fliegfederfrei_007

Yes, let`s talk fabric. The beautiful mustard jersey with the diamonds is maybe the softest knit I ever sewed with! The print is  adorable and sharp. I ordered at Petit Couture.

The quilted knit is from Miss Matatabi, I already used it here.

Can`t wait for the warm and sunny days!

Honeycomb Smock Dress – Tutorial

DSC_3203

Haute couture for a baby? It feels alike. Just kidding. In a way it`s like yoga for me. I love hand embroidering. It`s so meditative. The same stitches over and over again, while you let your thoughts fly. I think that`s the reason why I spend a few hours embroidering a baby dress.

DSC_3198-3

But look at this beauty, totally worth the effort, don`t you think? Hand smocking is an all time favorite. It gives the fabric a structure. And if you do it like me, on a small repetitive swatch, like a gingham, it changes the pattern in a very interesting way.

DSC_3263

The dress is self-drafted. I`m exploring the possibilities of gathering fabric. Smocking is a good one. It adds a little stretch to a woven fabric.

DSC_3232

DSC_3269

That`s a vintage button of my stash. Always a pleasure, to find the perfect one in my collection. I just lined the back bodice. The wrong side of a smock is nearly as beautiful as the front. I didn`t want to hide it. The armholes are finished with a very narrow bias-binding.

DSC_3235

Wanna try it yourself?

Here is the tutorial for Honeycomb Smocking

Continue reading

Plain Pleats

Japan_004

I didn`t make so many pleats for just one garment before, I guess. But, it was worth the effort. The fabric source is an old scarf, I found at a flea market once. I felt in love with the colors and the soft linen. It was like made for the dress I had in mind.

Japan_001

Japan_002

I imagined a low waist dress, without a gathered skirt. So I just took the whole width of the scarf and pleated the bodice part. The pattern is self drafted. I pleated the fabric first, then I cut out the pattern pieces. That`s way easier than calculate all those pleats in the pattern.

Japan_007

I wanted to add tulip sleeves to one of my projects for a long time. I think it`s a good match with this dress.

Japan_006

I planned to attach pockets. Fabric was cut out and ready. I just forgot to sew them in. As I noticed my fault, I was too lazy to unpick the side seams, I left them out.

Japan_008

I love the plain and smooth look of this dress. I guess, it`s going to look even softer, when the linen crinkles after washing.

Ready to… wear?

DSC_0011

When I felt in love with the Lotta dress by Compagnie-M, my little bean was much to small for a size 1Y. But, that`s exactly where the size range starts. As I`m not a very rational being, i couldn`t wait until she`ll be big enough. And of course, I was much to lazy to size it down. I just sewed the smallest size, prepared to wait more than half a year until she`ll be able to wear it, actually. Kind of silly, I know.

DSC_9742

I seems like she`s rather small, I thought, that she could probably wear it on her first birthday. But nope. I had to wait, until she was 16 months old. Every time, when I opened her closed I saw this nice dress. I don`t know how many times she had to try it on, just to put it back on the hanger for an other month.

DSC_0049

DSC_0052

She doesn`t understand, what`s the meaning of the pockets. Nonetheless, they`re seem to be funny.

DSC_0068

I can`t remember why I went for the button closure (that`s just one of three options). It looks nice on the hanger. But when she`s wearing it, I do not really like the look. Do you see what I mean? Next time, I would install a zipper for sure!

DSC_0023

The dress is lined with silk. It`s so soft, it feels good on the skin. Silk is such a beautiful material, it`s like water to sew with.

DSC_9731

Oh, I nearly forgot to introduce you to Rosalie, the co-star in this shooting. It was her first stuffed friend (and is still her only one), she`s much loved!

Water and Light

Wasserfarbekleid_004

I really made my dress a few cm shorter, just to save some of this beautiful fabric for her. It was exactly enough, to make this tinny little babydoll. Even though, I had to be creative. Sometimes, I ask myself, does it just happen to me? It seems like, I always have barely enough fabric.

Wasserfarbekleid_005

I wanted to show the different shades of color on the bodice too. As the squares are quite big, I went for a patchwork. I like the result!

Wasserfarbekleid_001

I`m not a patchworker, but I didn`t go for straight squares. I wanted it to look like the design on the skirt. Probably I shouldn`t say that… i did it with my serger.

Wasserfarbekleid_002

The dress is self-drafted. I love the shoulder part. If you ask me, the boxy shape is a nice contrast to the smooth skirt fabric.

Wasserfarbekleid_006

Usually, if I come up with a new dress and ask her to try it on, she says no-no and walks away as fast as can be. But this time, she took the dress in her hands and tried to pull it over her head. As if to say, what a beautiful dress you made me, mummy. She couldn`t make me a bigger compliment. I was touched!

Wasserfarbekleid_003

Earflap Cap – Free Pattern and Tutorial

Hut_003

It`s about 2 Months ago that I promised to share my Earflap Cap Pattern … I know, I know… . Better late than never. Yesterday we got snow again, that was my reminder. Here we go…

Hut_001

I just love this cap, she wears it nearly every day. It holds her ears cozy and warm. If you`re in a hurry, you can sew up one in about 45 minutes. It`s an easy and fast project. Perfect, if you need a last-minute baby gift.

I`m not an artist, I don`t know why, I felt more like drawing this tutorial, rather than taking pictures. But I was in a mood. Hope that works for you.

Here is your pattern, be carefull not to scale the pattern while printing.

It`s for a head circumference of 46-48 cm. That should fit a baby from 12-18 Months.

1.Earflap-Cap_001

Note: This is a pattern without seam allowance. You may add 1 cm.

2.

 Earflap-Cap_002

Sew the side pieces to the middle piece. Right sides facing (RSF). Do the same with the lining fabric.

Sew the flap RSF together, crop the fabric around the curved edges. Turn right side out. Press.

3.Earflap-Cap_003

Baste the flap and the straps to the seam allowance of the fabric.

4. Earflap-Cap_004

Sew fabric and lining RSF together (flap and straps should be between this two layers!). Leave the middle part in the back open (as indicated in the drawing). Turn right sides out, through this opening.

5. Earflap-Cap_005

Sew the opening close. Sew the flap to the cap, with a few hand stitches.

Congrats, your done!

That`s how it should look like…

Hut_002

share your procject with me… I would love to see your Caps.

https://www.facebook.com/fliegfederfrei

Drape, tuck and gather

Newyear1

What`s first…? The idea, the fabric or the pattern? For me, that`s not always a straight path. Mostly, everything starts with an idea in my mind, find the perfect pattern and fabric for, is a second step. But this time, in the beginning there was this fabric. I purchased it maybe half a year ago. I just loved the colors, they dovetails nicely with my hair, I think. It`s a Nani Iro double gauze from Miss Matatabi. If you follow along, you may know, i`m a bit crazy about Nani Iro. Not for nothing, this is maybe the softest double gauze I ever owned. It drapes so nicely.

Newyear2

It had to be a flowing robe, nothing fitted. You may remember my drape drape dress. This was my inspiration. I just wanted a dress, mostly made from one piece of fabric. Loosely draped around my body. I spent a few hours in front of a mirror, just to tuck everything in place. I own a dress-form with my measurements, but it didn’t work. I had to learn, that the movement of the body is the factor that changes everything. So I worked with my own body. Putting the dress on and off, sitting half-naked in front of the sewing machine. Just because, it took me to much time to get dressed and undressed between all those fittings.

Newyear3

It was a lot of hand-sewing. You wan`t find a better fabric for that. There is just one visible seam on this dress… All the tucks and gathers are blind-stiched to the inner layer of the double gauze.

Newyear4

Here you have it, my new years dress, I`m not going to wear. We don`t celebrate. I`m going to work this evening like I do every year. Doesn`t matter, I don`t mind. There`ll be a few opportunities to wear this dress next year, sure.

Newyear5

I feel like a christmas tree in our garden…! Yes, it was f***ing cold. The whole photo shoot took about 1 minute. I just ran out, and Mr. Fliegfederfrei made a few pictures. And then back to the warm and cosy fire-place in the house. Happy new year you all!

Julia`s Secret

Julia_sweater_004

I had the chance to test an other Compagnie M Pattern, the Julia sweater. It seems like i make it to a habit, to test her patterns. But, it`s just because they`re truly great. I always find a way, to make them my own. You probably saw a few Julia`s by now. Then you`ll notice, mine is a bit different. Not a big thing. I just changed the back piece to a low-backed one. It gives the sweater an entirely different look.

You can find a small tutorial on the end of the post.

Julia_sweater_005

That`s julias Secret, it`s a versatile pattern who can change his appearance easily. I wan`t go into all the various options. Marte showed all her gorgeous version during the last week. Just have a look and you`ll get an idea!

Julia_sweater_002

Julia_sweater_003

Julia_sweater_001

In the front, it`s a basic dolman sleeved sweater. Truly one to live in. I didn`t pull it off since I finished it. That speaks for itself! And that`s why… I had to sew a second one.

Julia_sweater_007

In a very wonderful quilted knit fabric I found at Miss Matatabi (yes, I do shop there a lot).

Julia_sweater_006

You may ask about the yellow stripes. It`s kind of a flat piping. I just cut a strip of yellow knit fabric, press it in half and sew it into the seam. Exactly, as you would do it with a piping. I think there is a special serger foot to do so, i do it without. No big deal. But if you ask me, a very cool detail.

Julia_sweater_008

You would like to give it a go?

Here is my how to… it`s quite easy! I`ll give you a view on my altered back-pattern piece.

Julia_patternpice

You just measure down the fold on the center back, until your taille. Draft a new neckline with the help of a curved lineal. Start at the shoulder seam head down until your taille high on the center back. Easy as pie. You could even draw it free hand. Just be sure to draft it on fold. You want it to be exactly symmetrical on both sides. If you think that you don`t feel comfortable without wearing a bra, you can draft your new neckline just as deep, so it will still cover it. Be creative!

Julia_sweater_009

To finish the raw edge I attached a self-made double folded knit-band. I do that with my coverlook (great to have!). You can do it your prefered way, everything works. Because the sweater has a loose silhouette, I attached a knit-strap on the shoulder seam, to hold the sweater in place.

You can get your Julia here.

Compagnie-M_flyer_pattern-tour_julia_sweater_women